Lightroom, XMP, Windows, and Removable Storage
Enjoy the summer!
All LibRaw Products and Bundles - 25% off
Our Special Prices are valid until July 28, 2026.
- As Adobe Lightroom Windows users know, this application has been oppressive for users of removable media (disk drives, flash cards), imposing some limitations:
- XMP sidecar files aren't read on import;
- Metadata - Save to File (after import) doesn't work as expected;
- Metadata - Read from File has the same usability problem.
Obviously, this puts image culling applications that produce XMP files (including FastRawViewer) in a bit of a bind. It's impossible to cull/rate/label files right on a flash card - they first need to be copied onto a local disk, XMPed, and then imported into Lightroom from there.
Aside from problems with flash cards, the same may happen with removable USB disk drives, Lightroom may neither read nor write XMP files from or to such a drive (which is a problem if you are using a removable USB drive as portable means of storage in the field; it's also a problem if you want to deliver your shots together with XMP files to a pre-press bureau, a customer, etc).
Since we're a bit overwhelmed with the questions regarding this problem, and the answer "that's just Lightroom" is both overly repetitive and not very satisfactory, we suggest the following lifehack.
- Share the flash card (or just the DCIM folder on it) on your local network (just for yourself).
- Optionally, mount it as a disk, assigning a letter. Or, simply use the network share name (UNC).
- Browse the files "through the network" rather than locally.
- When the files are browsed "through the network":
- Lightroom will read/write XMP sidecar files (which is what we wanted)
- However, import operations will leave files where they are, so that if you want to copy them (as is often the case with SD cards), the option to copy on import will need to be explicitly switched on.
Here's how that looks on a Windows 10 platform:
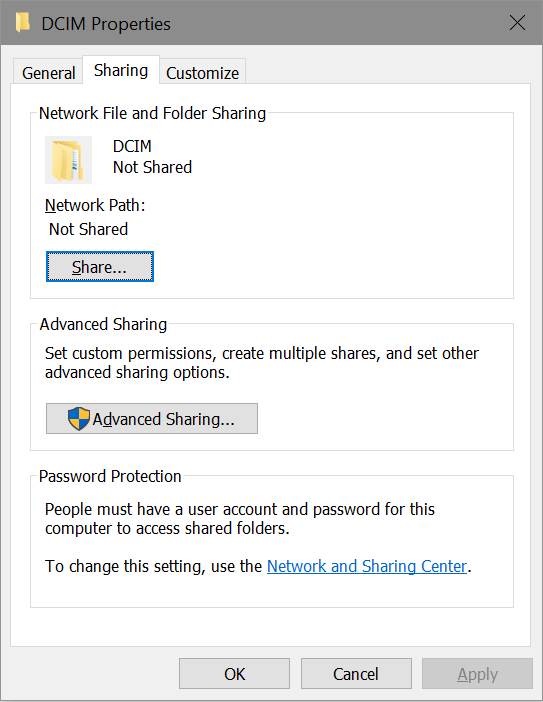
- Using Windows Explorer, right-click on the DCIM folder on the memory card. Choose "Properties" on the drop-down menu, go to the "Sharing" tab (fig. 1 below).
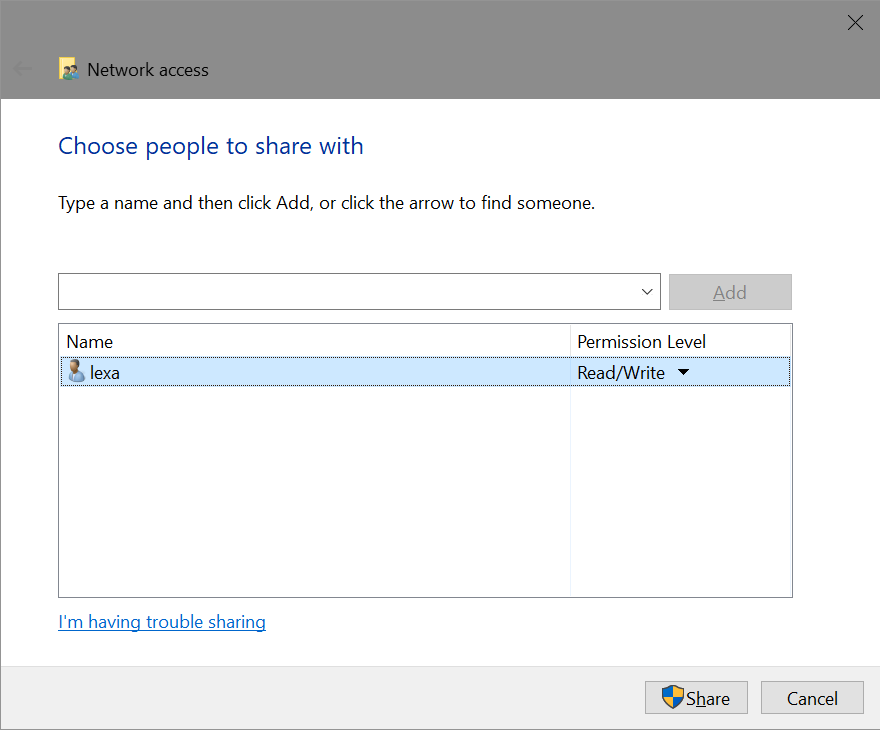
- Click the "Share" button and select the user (yourself, fig. 2).
- Returning to the "Sharing" tab, we can see that a network path (in our case, \\Ganzer64-10\dcim) appeared (fig. 3).

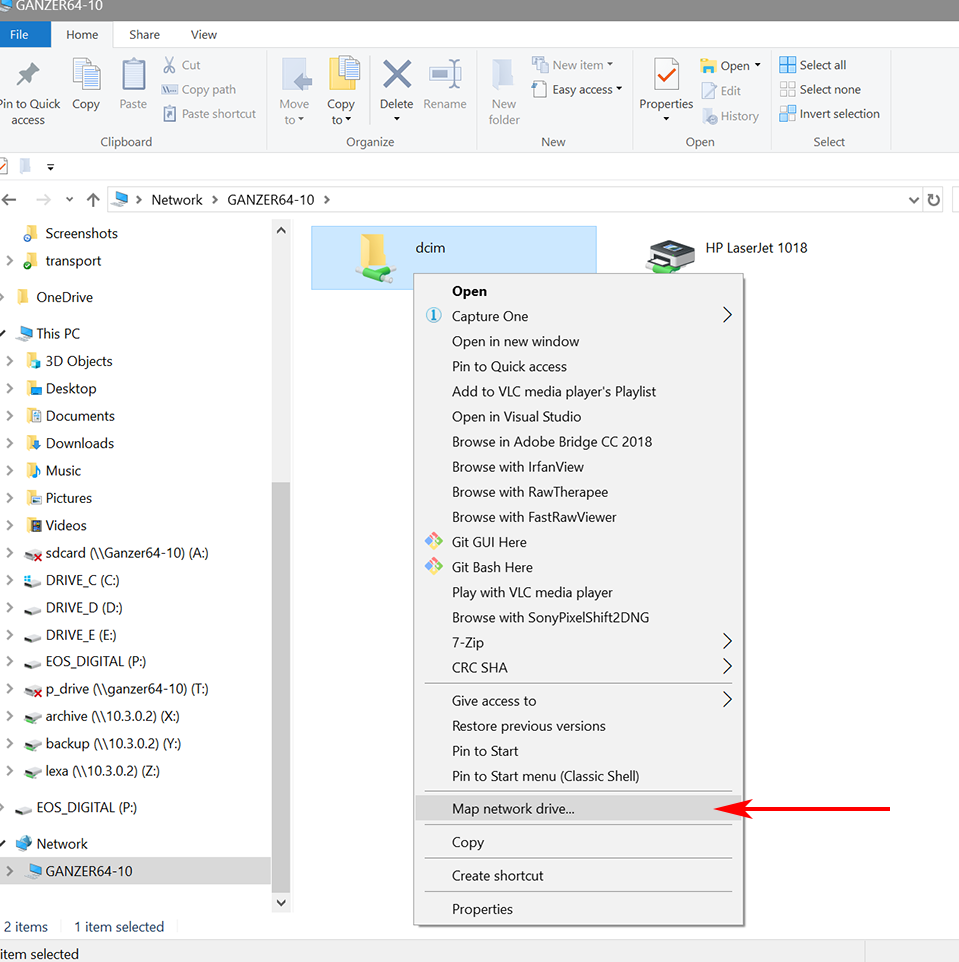
- Now, we return to Windows Explorer and, in the Network tab, we can select our computer, click it, see the DCIM network path, right-click on this network path, and select "Map network drive" (fig. 4)
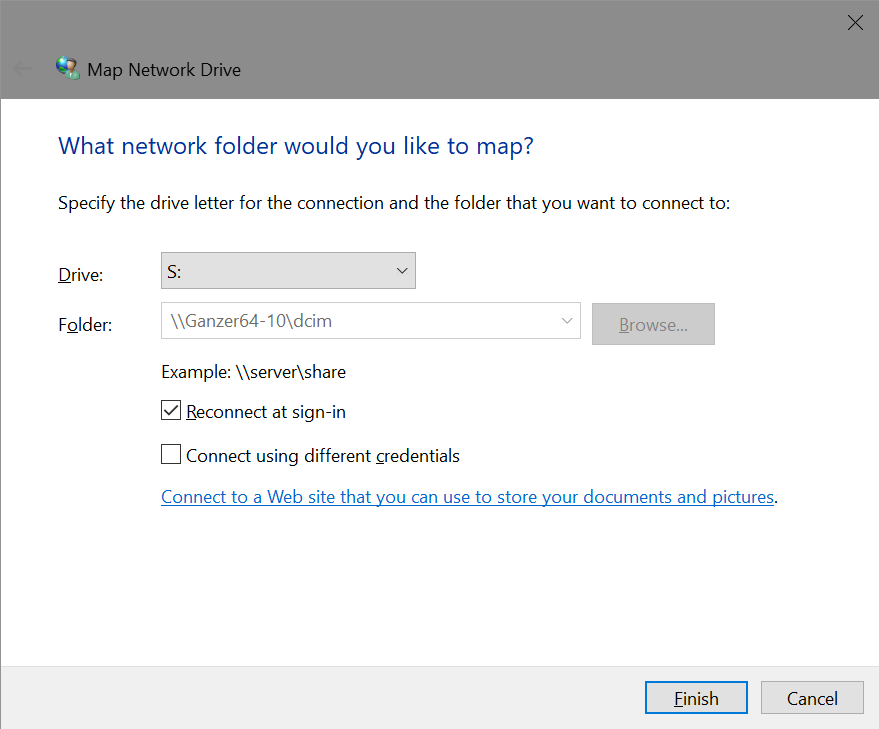
- On the next screen, we select the letter to assign to this network path (fig. 5).
- Et voila, we see our local P:\DCIM path as network drive S:, from which Lightroom will happily take our XMP files.
- Please take into account that, when importing from a flash card to a local drive, Lightroom, knowing that the origin is a flash card, will suggest Copy or Move mode. Now that Lightroom detects the drive as a networked, it will default to Add mode. To override this, one will need to switch to Copy or Move in the Import Settings (the upper line).
- If your photos are on a removable drive, you will need to "re-find the folder" (since we've effectively moved to a different drive letter - it was a letter designating a local drive, now it's another letter designating a network drive). You can do this by right-clicking on the folder in the Folders tab, and selecting: "Update folder location" if the folder is visible (green) or selecting "Find missing folder" if Lightroom lost it.
- This lifehack tolerates changing SD cards. The DCIM folder visible as \\computer-name\dcim will continue to be visible as such.