Why Bother Shooting RAW if Culling JPEGs
End of Fall Sale!
All LibRaw Products and Bundles - 25% off
Our Special Prices are valid until December 15, 2025.
First published at photographylife.com
Watch the video that corresponds to this article
What do you think is the possibility, when you are choosing and sorting images based on the JPEG previews, that you are going to discard the better-quality image, and keep the lesser-quality one? Let’s take a look at a typical “training” shot for a holiday – noon of a sunny day, blue Ionian sea, bright white limestone pebbles, bushes with dark-green, high-detail leaves (which lose all detail if the shot is underexposed), deep shadows under the bushes. These types of scenes typically have a very wide dynamic range. We will see later, however, that the real range of the shot we are examining is pretty much only 8 EV, if the exposure is technically correct.
We shoot in RAW, bracket the exposure, and try to choose the best shot picking the image the “old” way, which is based on the built-in JPEG, using the JPEG histogram, and the brightness on the screen.
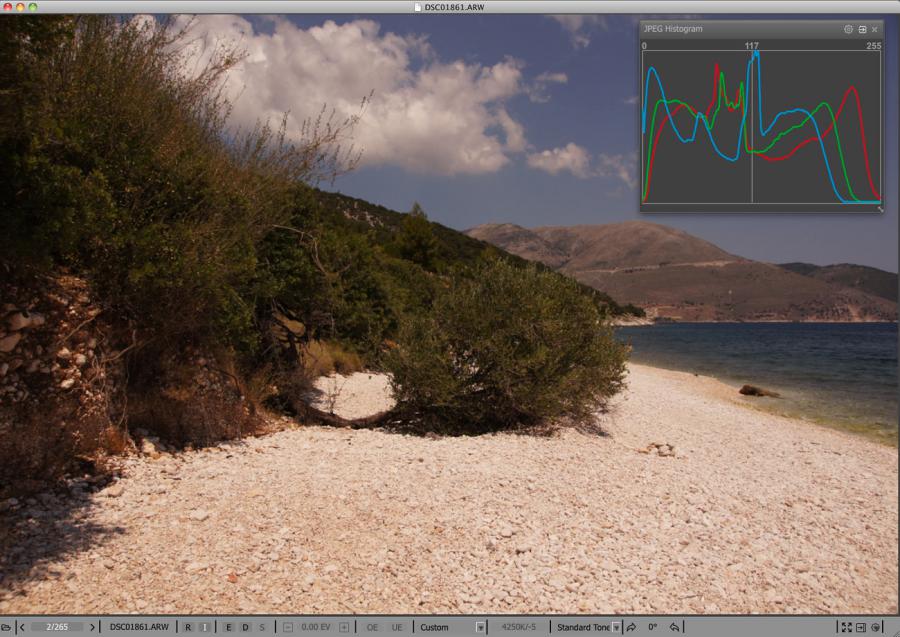
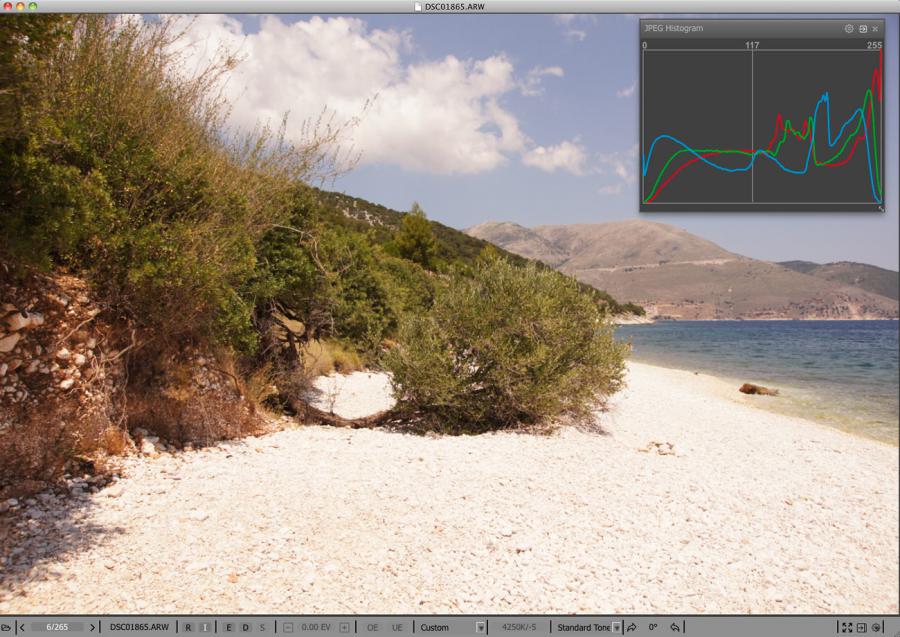
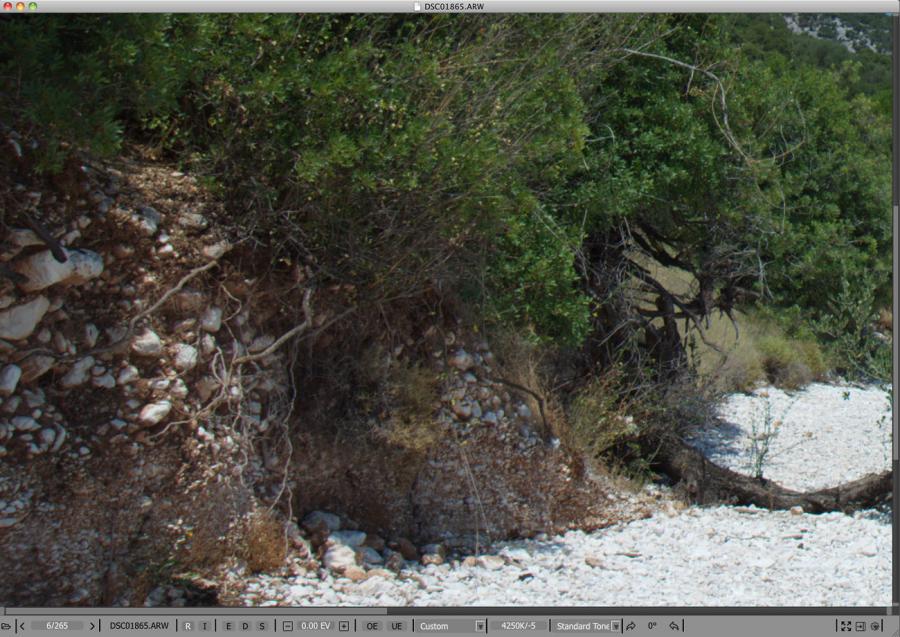
Let’s look at the two shots, one taken at 1/1600 sec (shot #1861), and the other, taken +1.33 EV, at 1/640 sec (shot #1865):
Looking at the JPEGs and JPEG histograms, out of the two shots, the shot #1861 (Figure 1), is exactly what we need in terms of exposure (histogram just touching the right wall), while the second shot, #1865 (Figure 2), is heavily overexposed on the pebbles and on clouds, lacking plenty of details in those areas; and the histogram for the embedded JPEG of the shot #1865 “climbs the right wall”, confirming what seems to be overexposure.
Now let’s look at the RAW for the same images, setting white balance from a white pebble and using propagation mode so that the next file will be opened with the same white balance we have set for this one.
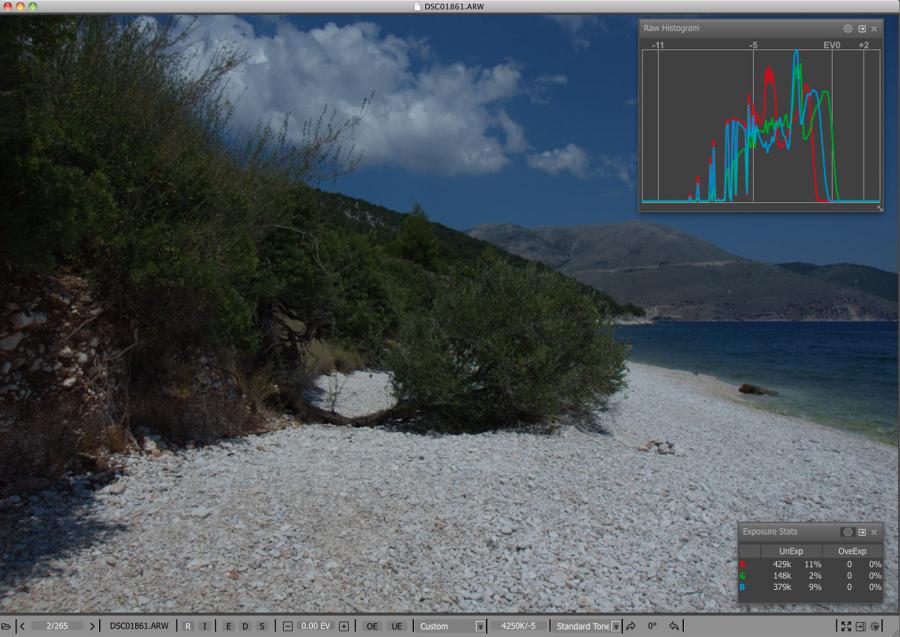
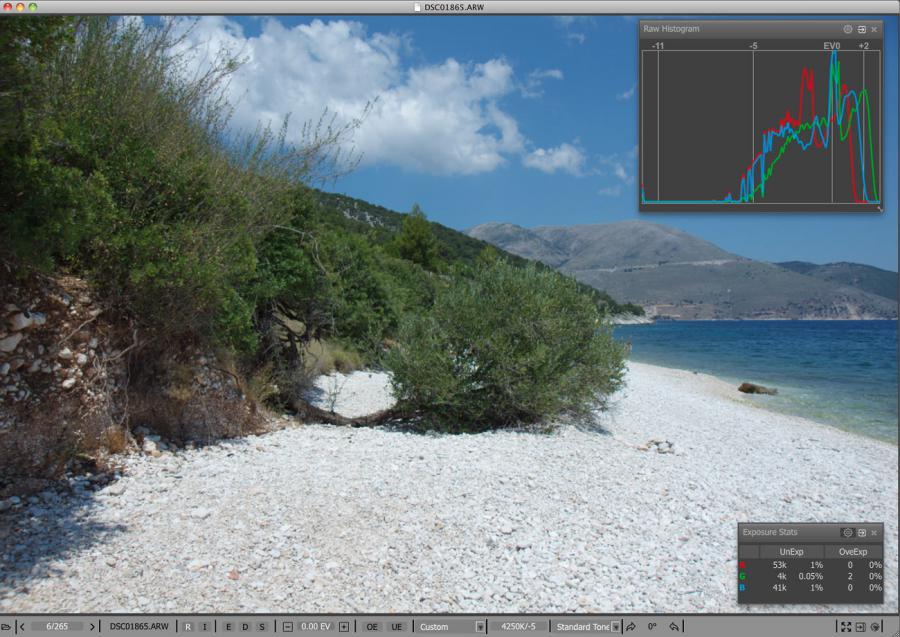
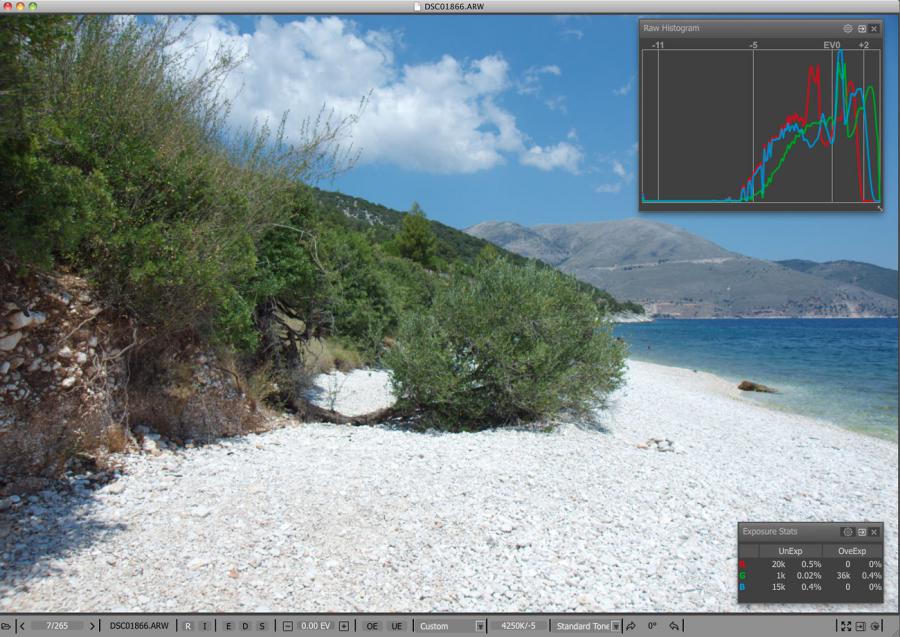
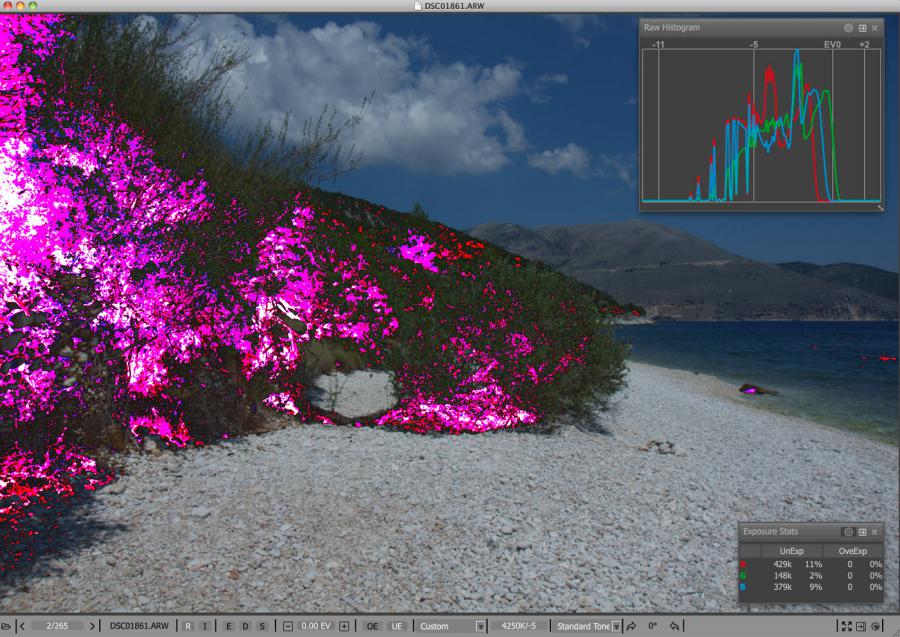
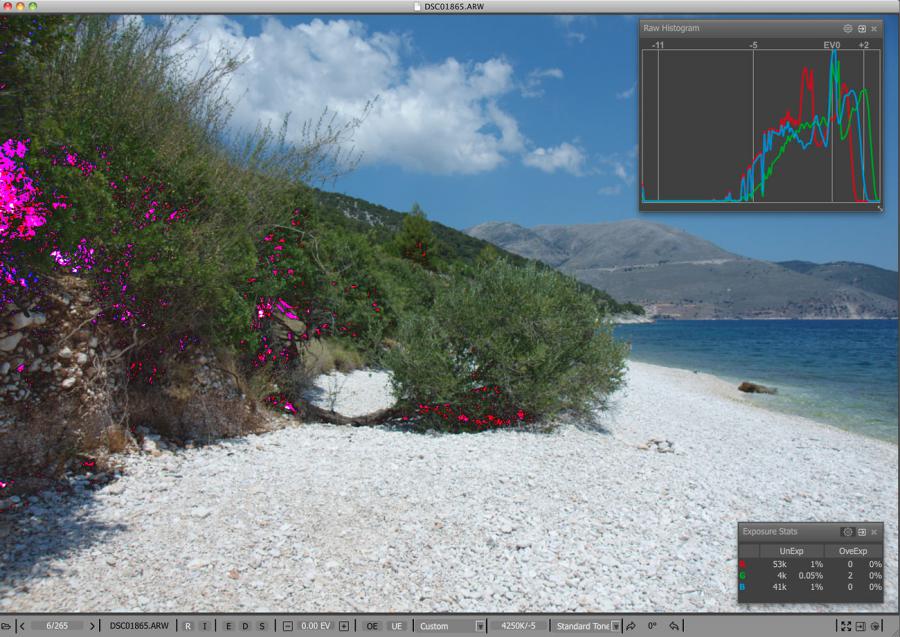
Consider the RAW histogram and overexposure statistics for the shot that seems to be correctly exposed if looking at JPEG preview (Figure 3), and now the other one that looked overexposed in JPEG (Figure 4):
Oops… Examining the RAW histogram for each of the shots, we see that the first one, #1861, that looked properly exposed based on JPEG, is heavily underexposed in RAW (the histogram is shifted to the left, having a substantial gap between the edge of the histogram and the right wall), while the other shot, #1865, is taken using what is often referred to as “ETTR technique” – histogram is all the way to the right, the shot is exposed in such a way that it has nearly no overexposed pixels.
In this manner, when trying to pick an image using JPEG, and not RAW, and making the decision based on the JPEG histogram and on-screen brightness but not the RAW histogram, we have chosen an image that is underexposed by 1.33EV.
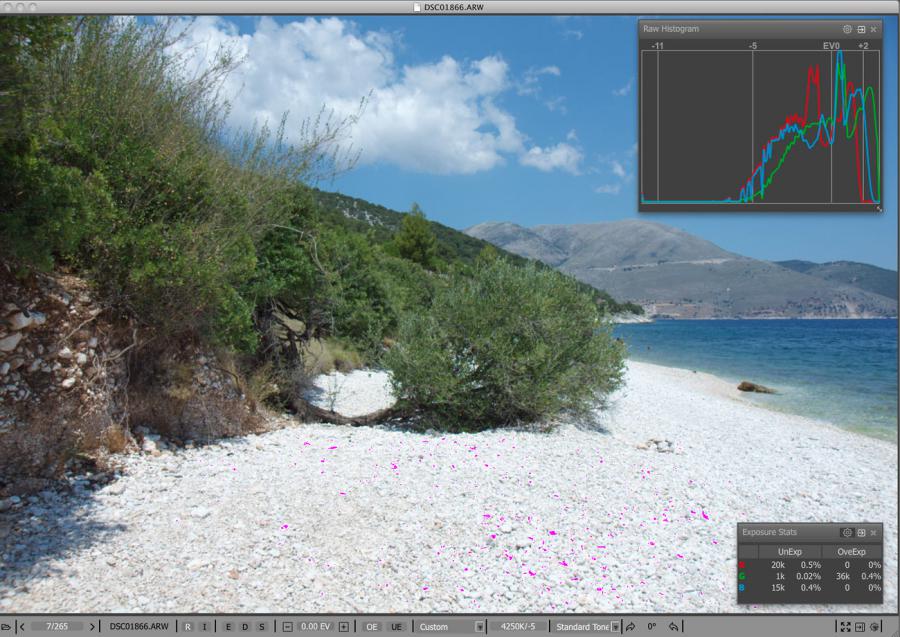
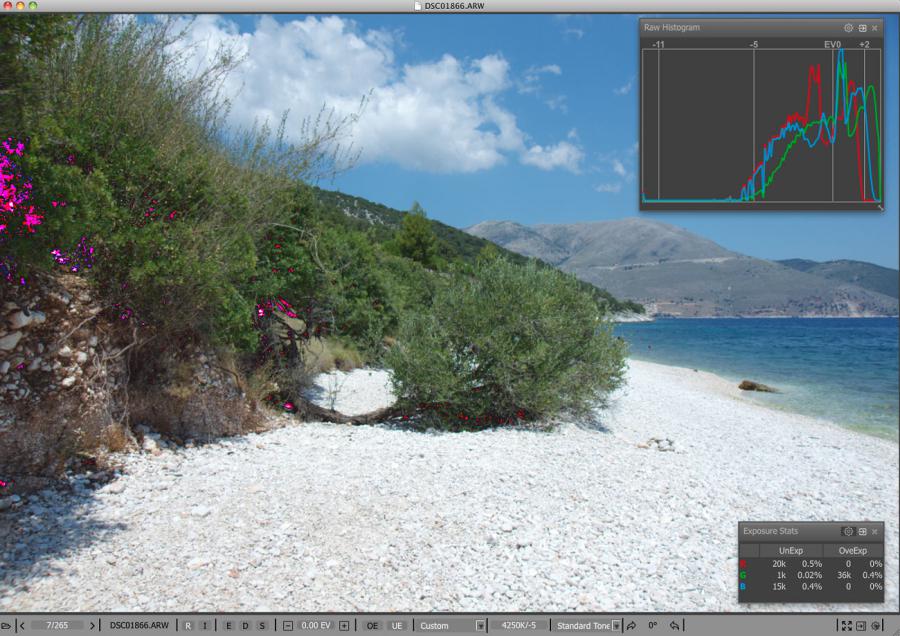
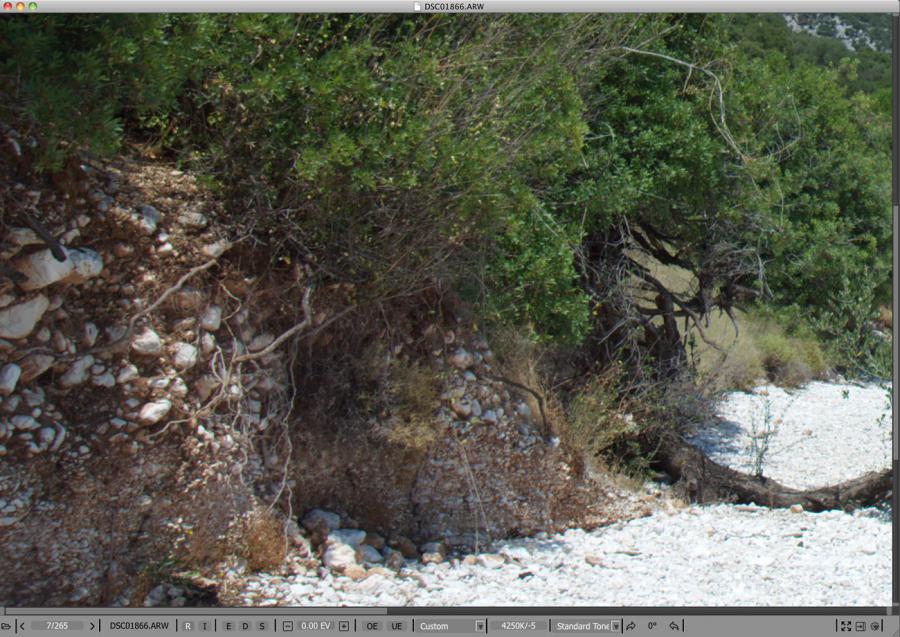
Let’s have a look at the next shot #1866 (Figure 5), where 1/3 EV is added to exposure compared to already “hot” shot #1865. We can see that we have lost very little – only 0.4% of pixels ended up overexposed, and only in the green channel. (To see what are the overexposed areas on the shot we press ‘O’ on the keyboard, and magenta highlighting appears on the blown-out areas on the pebbles - Figure 6).
This small defect is easily fixed in RAW conversion.
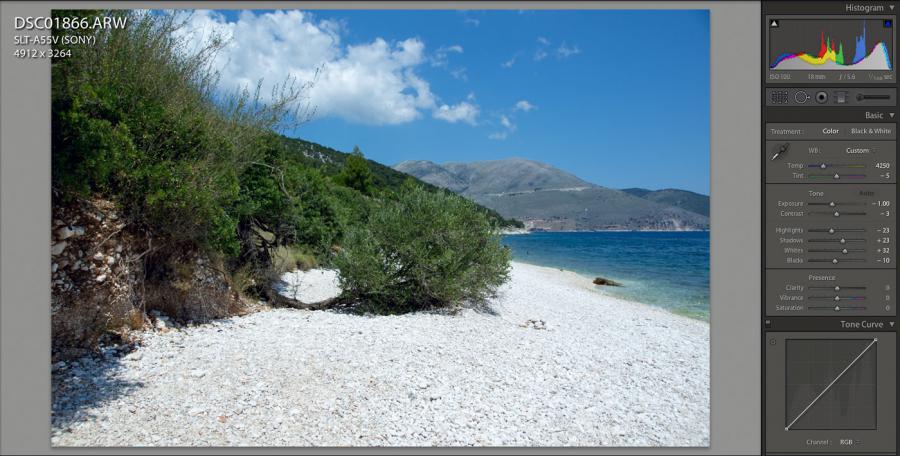
Opening this file in Adobe Lightroom, the white balance is picked from XMP file recorded by FastRawViewer so we do not need to set it again, and pressing the Auto button for the Tone settings, we will get the following very usable image (Figure 7).
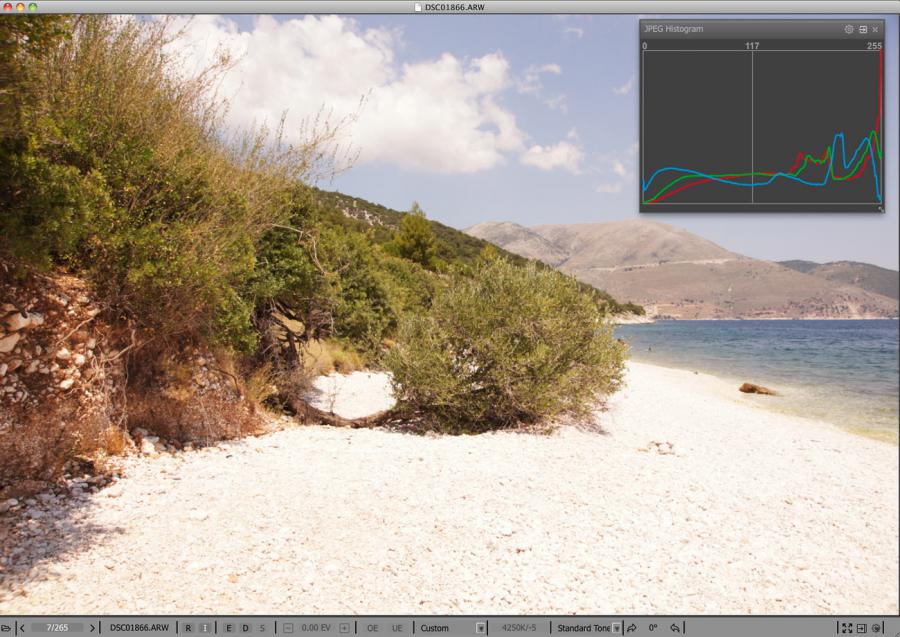
Meanwhile, if we had looked at the embedded JPEG for the shot #1866 and its JPEG histogram, we would have surely discarded this shot, because it looks grossly overexposed, as also indicated by the JPEG histogram climbing the “right wall” (Figure 8).
Take note that based on the RAW histogram for the shot #1861 it appears that we need about 10 EV dynamic range for the camera to render the details in shadows. This is quite optimistic for the given camera, not to mention that for quality and detailed shadow reproduction no more than 8 EV is allowed on the final image.
It turns out that with technically correct exposure, we can place most of the scene in the required 8 EV range during the shoot, without additional work in a converter or graphic editor.
Let’s now explore the underexposure, evaluating the image areas below the 8 EV limit. (To display underexposure highlighting we press ‘U’).
We can see that on the shot #1861, around 10% of the area is underexposed both in the red and blue channels (see the magenta and white highlighting on the Figure 9).
While on the shot #1865 (Figure 10) the underexposure zone makes up about 1% of the total image area, which is completely normal. For the shot #1866 (Figure 11), the overexposure zone is a rather negligible 0.5% of pixels.
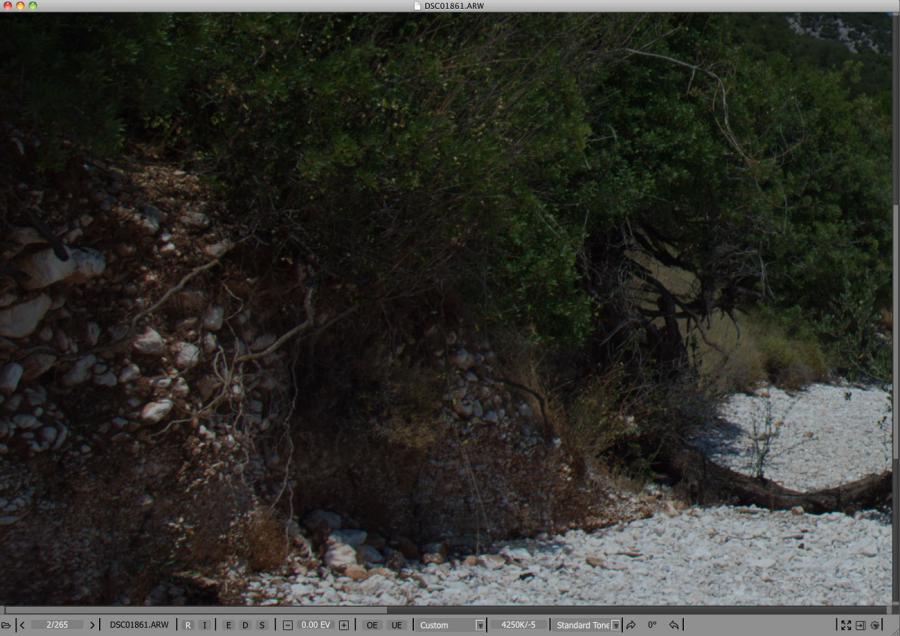
Now let’s visually analyze the deep shadows for each of the three images.
We can see that for the shot #1861 (Figure 12), the details in shadows are plugged to pitch black.
While for shot #1865 (figure 13) and especially on shot #1866 (figure 14) they are quite usable. Basing our image selection on JPEGs we would end up with trashing the correctly exposed shots and picking a shot that is underexposed somewhere around 1.5 stops.
As you can see, JPEG histograms can be very deceptive and are no indication of RAW data. So… When culling shots judging the technical quality based on the embedded JPEGs or uncontrolled RAW conversions instead of RAW, you risk making a mistake, especially with difficult scenes having deep shadows, throwing away perfectly good exposures in favor of not so good – because in some sense you are choosing the shots being mislead or even blindfolded.

Comments
Luc (not verified)
Tue, 05/12/2015 - 14:06
Permalink
Camera dynamic range on Dpreview
I don't understand at base iso (100) on many Nikon such as the D750, or D800 they show DR as high as 14.3 Evs, and from your text you mentionned that we can not go under -8Evs for retrieving quality and detail shadows. I don't think any of theses cameras can go 14-8 = +6 Evs in the highlights, please would you give me the information, why Nikon & Sony try to develop sensors with such high DR if only about 11 Evs (-8 Ev to + 3Ev) is usable ?
regards
Iliah
Tue, 05/12/2015 - 14:28
Permalink
Developing sensors has, as
Developing sensors has, as one of the goals, decreasing noise in the range of 11 EV, and that leads to decreasing the noise below 11 EV down from clipping point as well.
Samer Hosary (not verified)
Sat, 09/07/2019 - 04:03
Permalink
Typo
While on the shot #1865 (Figure 10) the underexposure zone makes up about 1% of the total image area, which is completely normal. For the shot #1866 (Figure 11), the overexposure underexposure zone is a rather negligible 0.5% of pixels.
LibRaw
Sat, 09/07/2019 - 10:35
Permalink
"For the (even hotter - IB)
"For the (even hotter - IB) shot #1866 (Figure 11), the overexposure zone is (larger, but still - IB) a rather negligible 0.5% of pixels (while underexposure zone is further decreased - IB)".
Mustafa D (not verified)
Thu, 11/13/2025 - 05:40
Permalink
Thank you
Thank you for this informative article.
Also, your display can have an effect on rendering of images (its gamma setting, its color space, blue light filtering mode, etc).
This is why RAW histograms etc are very important to look at along with visual inspection of the image.
Even when shooting with a camera, especially in low light, it is good to take a test shot and check the histogram and not rely solely on the camera's display (as its brightness level can affect the appearance of the image too).
Add new comment