Sorting Photos with FastRawViewer
So, the shoot is over and you need to deal with the material you got from it. There's always the allure of sorting photos, setting the ratings and labels directly to the memory card and then just deleting what's unnecessary from the card.
However... writing to a memory card outside the camera is unsafe (USB malfunctions, sudden disconnects, card failure, spontaneous computer reboots - any or all of these may cause a disaster). That is why sorting photos by rating them, labeling, or moving to different folders while the photos (and destination folders) remain on a memory card is not a great idea.
On top of that, Adobe Lightroom doesn't expect and therefore ignores any sidecar XMP files on memory cards (those sidecar files are where all ratings, labels, titles, and descriptions assigned to a raw file are contained), and may also have trouble exporting XMP from external or networked drives. So, if you have decided to take the risk and assigned metadata to your photos while sorting photos directly on a memory card, you still need to copy the files and their sidecars to a hard drive for Adobe Lightroom to acknowledge your sorting tags.
We are often asked, how do we deal with these limitations and risks ourselves? Now, we're not saying that this is the only way, but here is what we do: it makes sense to follow a slightly different, 2-stage workflow for sorting photos, which avoids both writing to a card and wasting time and disk space on copying and ingesting (into Adobe Lightroom) all the files while some of them may be “missed shots”.
Suggested 2-stage Workflow for Initial Sorting Photos with FastRawViewer:
- Browse the memory card using FastRawViewer, select the files you want to keep, and copy the selected files to a folder on a hard drive.
- Sort the photos you've copied to the hard drive directly on that hard drive (assign labels, ratings, titles, descriptions, copy or move to different (sub-)folders, or move to the _Rejected subfolder)
In more detail, a workflow to perform initial sorting of photos in 2 stages may look like so:
- Note 1: We are aiming describe the fastest way to fulfill the operations; that is why we would mention only keyboard shortcuts and mouse-click operations. Of course all the same operations are available through Menu → File →..., Menu → Select, and Menu → XMP Metadata.
- Note 2: All of the shortcuts mentioned below can be customized according to your personal preferences using Keyboard Shortcut editor available through Menu → File → Customize → Keyboard Shortcuts
Stage 1. Browse the memory card using FastRawViewer, select the files you want to keep and copy the selected files to a folder on the hard drive
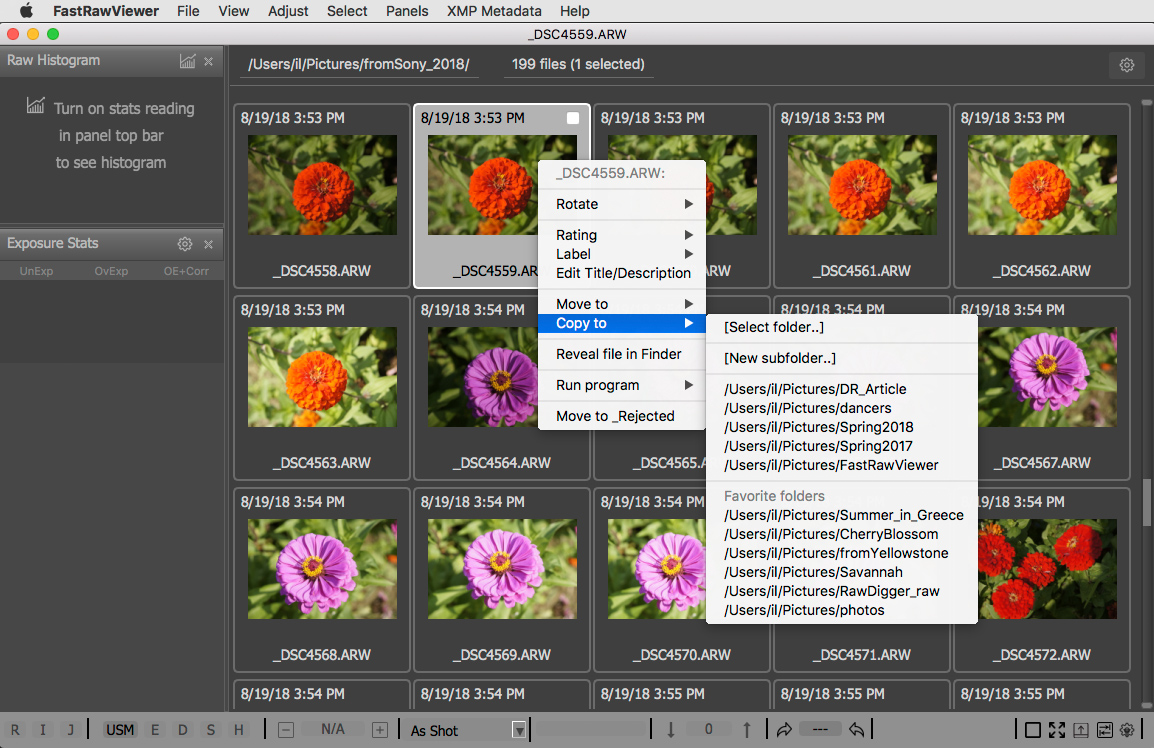
How to Copy a Single File:
- To copy a single file, having it active:
- press letter “C” on the keyboard, or
- directly on the file view right-click and choose “Copy to” from dropdown menu.
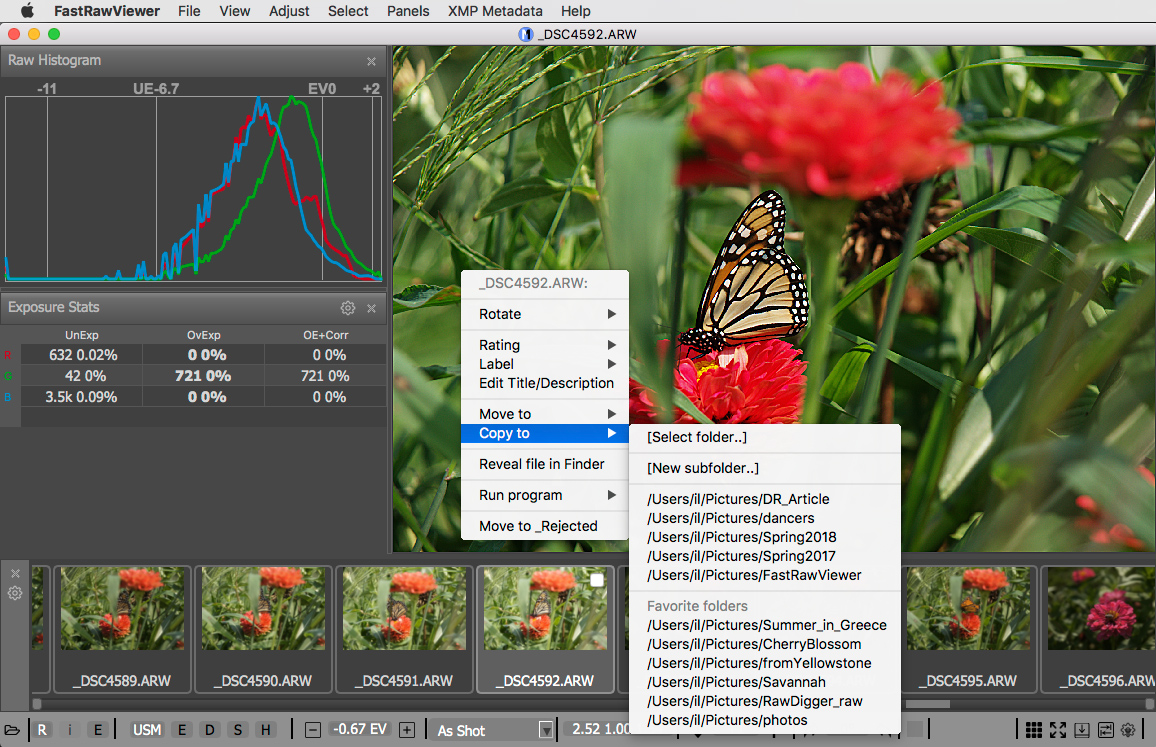
- or on the file thumbnail in the Filmstrip or in the Grid right-click and choose “Copy to” from dropdown menu
- Repeat this operation as necessary; to copy to the same folder (the folder that was the destination for the previous copy operation), you can use Shift+C
- To undo the copy operation use Ctrl+Z (if on a Mac, it is ⌘Z). This operation can also be repeated, limited by the "Undo history length" parameter in Preferences → Copy/Move/Reject
- For more in-depth information, please read Copying and Moving Single Files, and Preferences for "Copy/Move/Reject" operations
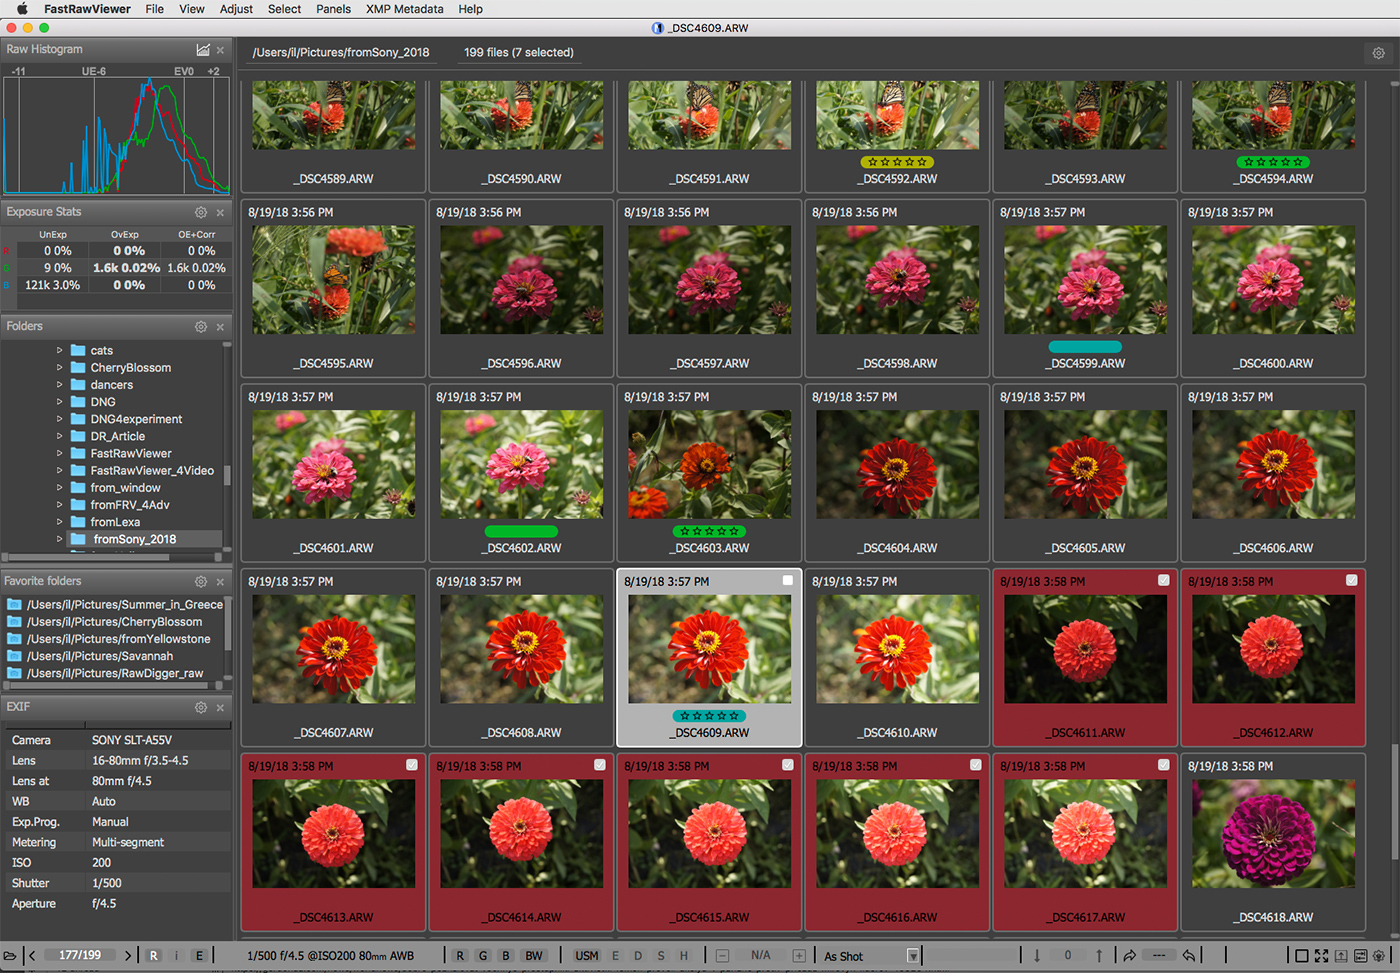
How to Select a Single File or a Group of Files:
[ first, a distinction: below we show how the thumbnails for the files in different states of selection / activity look; the colors and contrasts for the borders and backgrounds are user-adjustable, Preferences → Interface ]
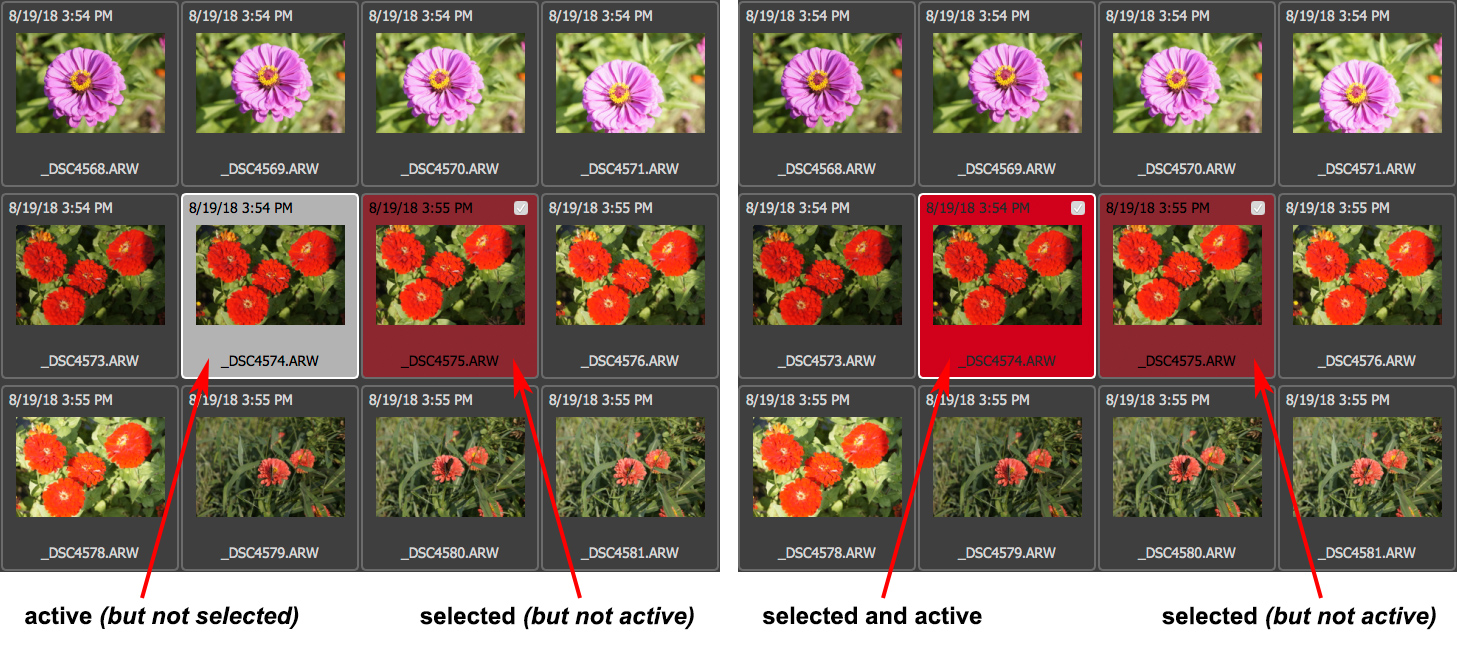
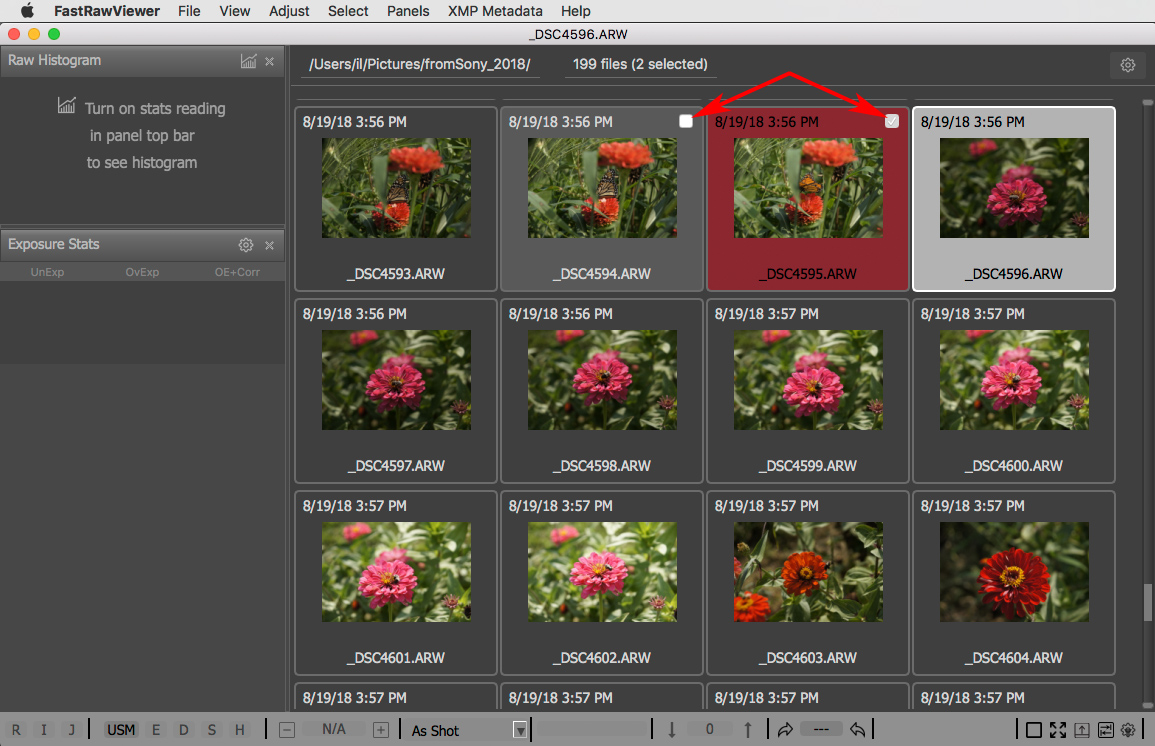
How to Add or Remove a Single File to / from Selection, or to Start a Selection:
- to select or deselect the current (active) file press Ctrl+/ (if on a Mac, it is ⌘/).
- to select or deselect the current file and move to the next one, press Ctrl+. or Shift+RightArrow (if on a Mac, it is ⌘. or ⇧→)
- in the Filmstrip or in the Grid view, you can select and deselect a file (not necessarily an active one) via:
- Ctrl+MouseClick (if on a Mac, it is ⌘+MouseClick)
- or by checking / unchecking the checkbox in the upper-right hand corner of the thumbnail; the checkbox will appear while mouse-hovering over the thumbnail
- On the picture below at the top row of thumbnails are shown from right to left: a thumbnail of the active but not selected file, a thumbnail of the already selected file, a thumbnail over which the mouse hovers.
How to Select a Sequence of Consecutive Files:
This is useful, for example, when working with panorama sequences or, generally, when preparing a composite image or an animation.
- Once the first image is selected, in the Grid View or in the Filmstrip, you can Shift+Click on the last image; as a result, all images from the first to the last will be selected. If there are no already-selected images in the group you are trying to select, all of the images starting with the active and ending with the one selected through Shift+Click become selected.
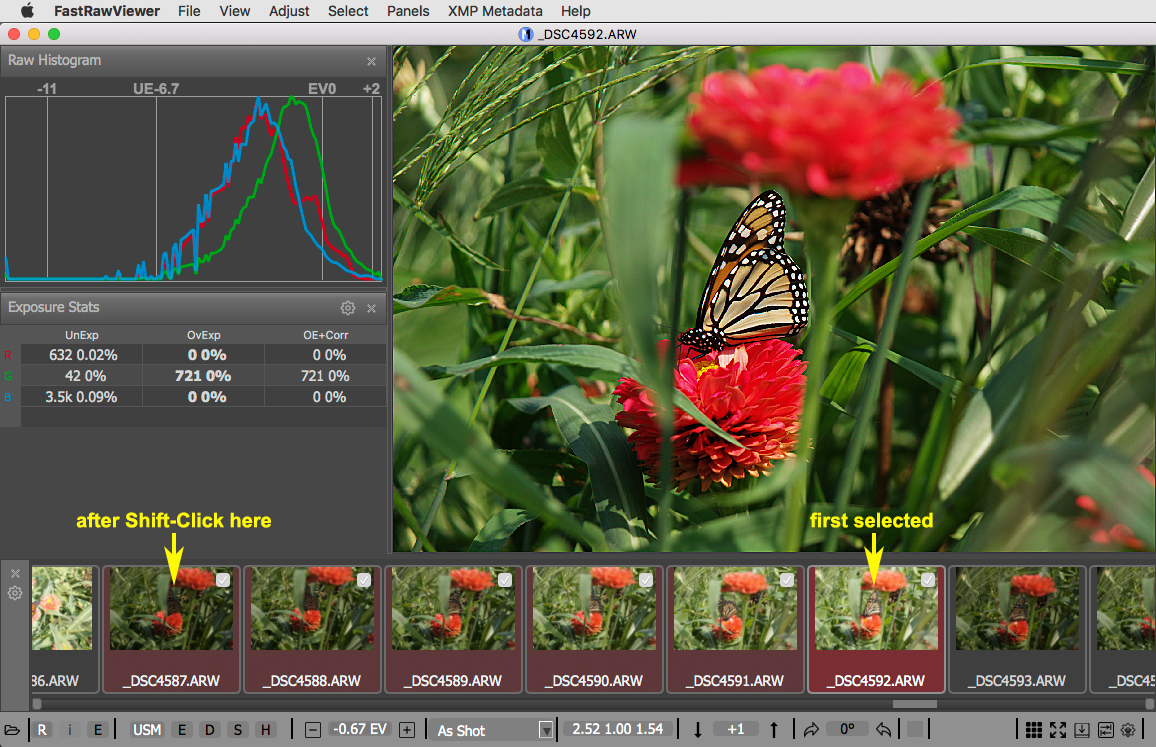
- Of course, you can add or remove any number of images to / from selection, one by one, using the same actions as described in the previous sections "How to add / remove a single file to / from selection, or start a selection"
- For more details on the selection procedures and modes please read Operations with Multiple Files.
- Default shortcuts that are useful for this purpose can be found at Standard FastRawViewer Keyboard Shortcuts, you can assign shortcuts that suit you better fairly simply - please see Setting the Keyboard Shortcuts.
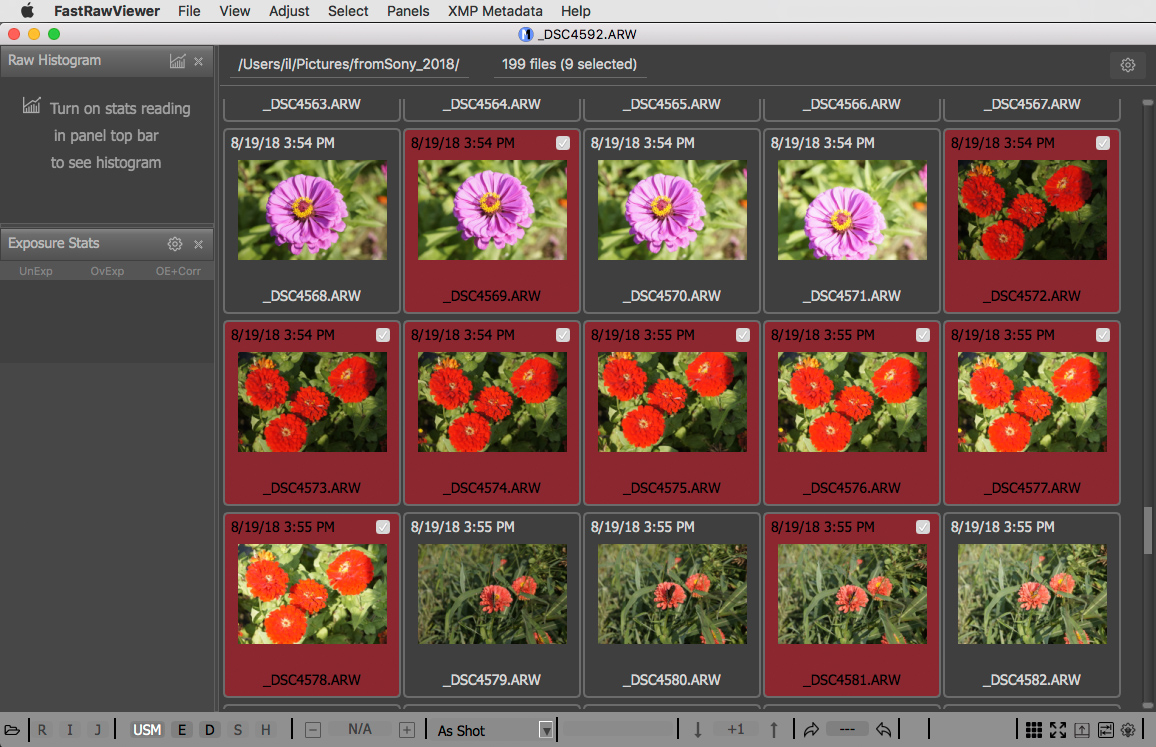
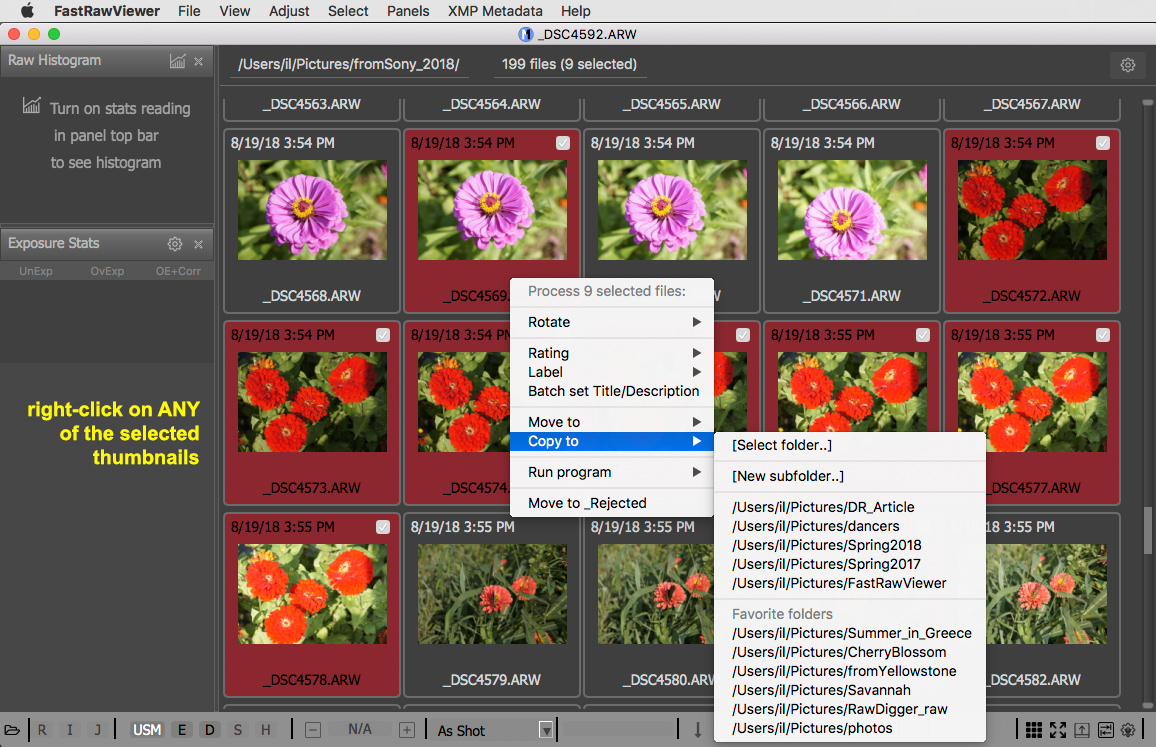
How to Copy Selected Files
- To copy a group of selected files, in the Filmstrip or in the Grid, right-click on any of the selected files and choose “Copy to...” from the drop-down menu.
- As was already mentioned, to undo (reverse) copy operations one can use Ctrl+Z (if on a Mac, it is ⌘Z)
For more details please look at Actions on marked/selected files.
Some other functions that may be convenient here are: Favorite Folders; New Subfolder.
Stage 2. Sorting Photos / Files You've Copied to Your Hard Drive
- FastRawViewer provides extremely helpful RAW-based tools that allow one to make a decision about every photo's fate. These tools allow one to:
- check exposure, and correct lightness (raw histogram, raw exposure statistics, over- and under-exposure indication, exposure compensation)
- examine details in highlights and shadows, audit noise in the shadows, outline in-focus and highly detailed areas, appraise each raw channel independently - that is, to get a better idea of the image plasticity (highlight inspection, shadow boost, focus peaking, per channel view)
- experiment with white balance and contrast curve.
To get an idea about the main tools provided by FastRawViewer for sorting photos, please see Key Benefits and Features of FastRawViewer. For a detailed description please read the Manual
Assign Labels, Ratings, Titles and Descriptions to the "Keepers"
While sorting images you can assign labels, ratings, titles, and descriptions to a single file or to a group of selected files. Assigned metadata will be saved in XMP sidecar files for each file.
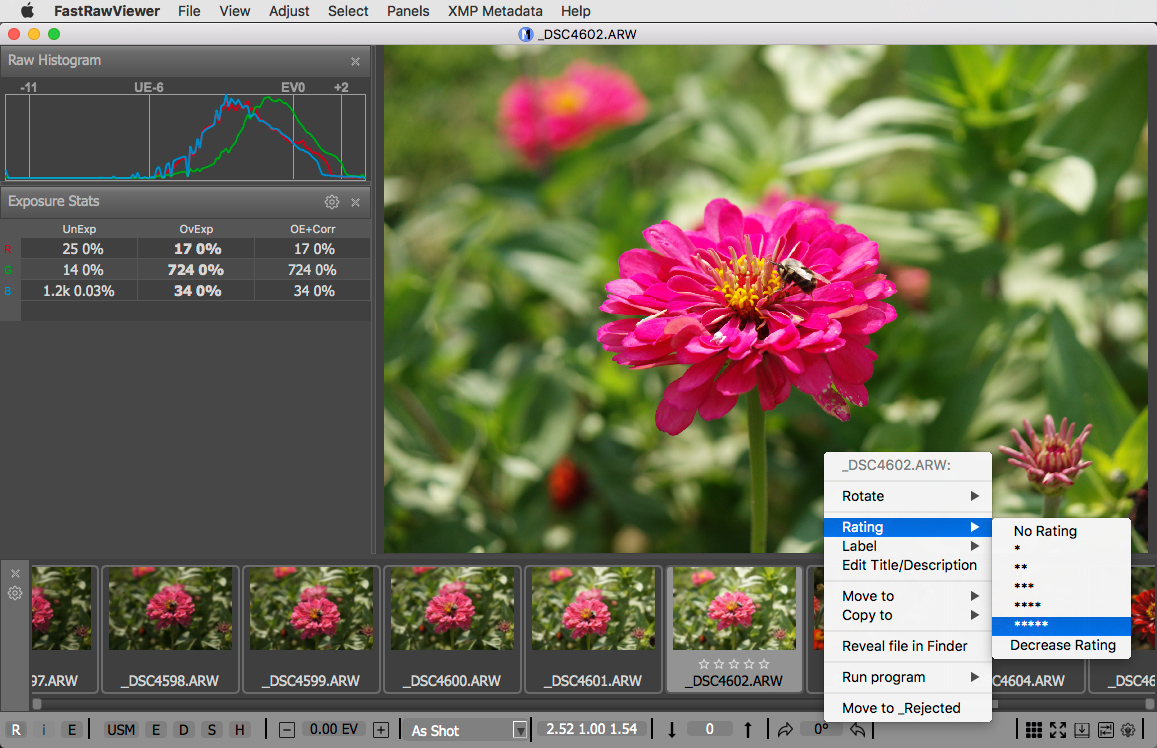
How to Assign Labels, Ratings, Titles, and Descriptions to a Single File
- to set or clear XMP metadata:
- right-click on the file in the main view and choose from the drop-down menu the option that fits;
- or, if there is no selection, right-click on a thumbnail in the Filmstrip or in the Grid and choose the desired option from the drop-down menu;
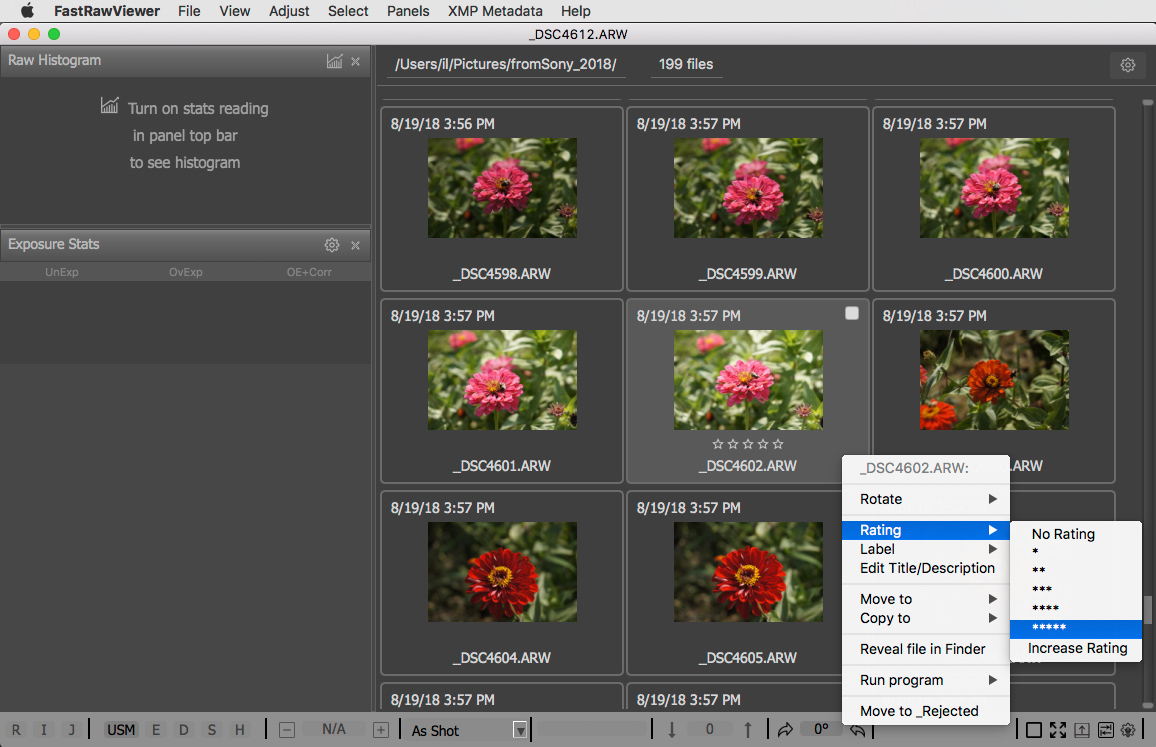
- or, use the corresponding shortcut (can be found in Menu → XMP Metadata);
- to increase or decrease the rating use Alt+. and Alt+, (on a Mac ⌥. and ⌥,, respectively);
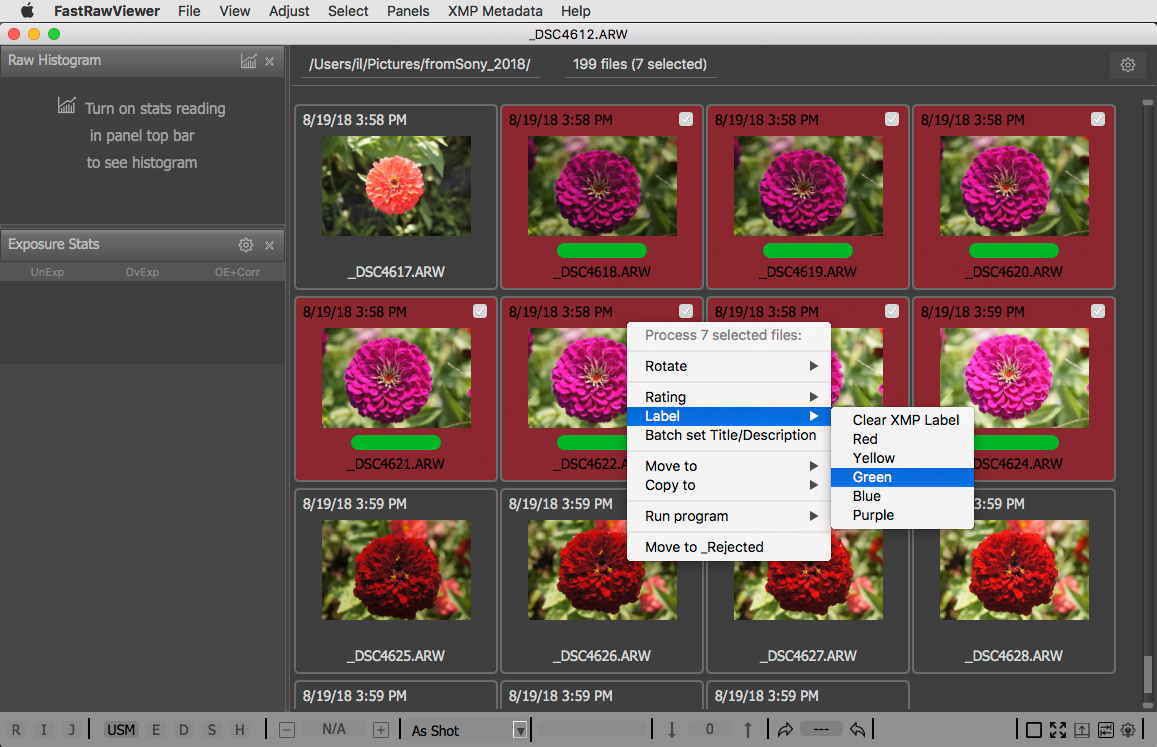
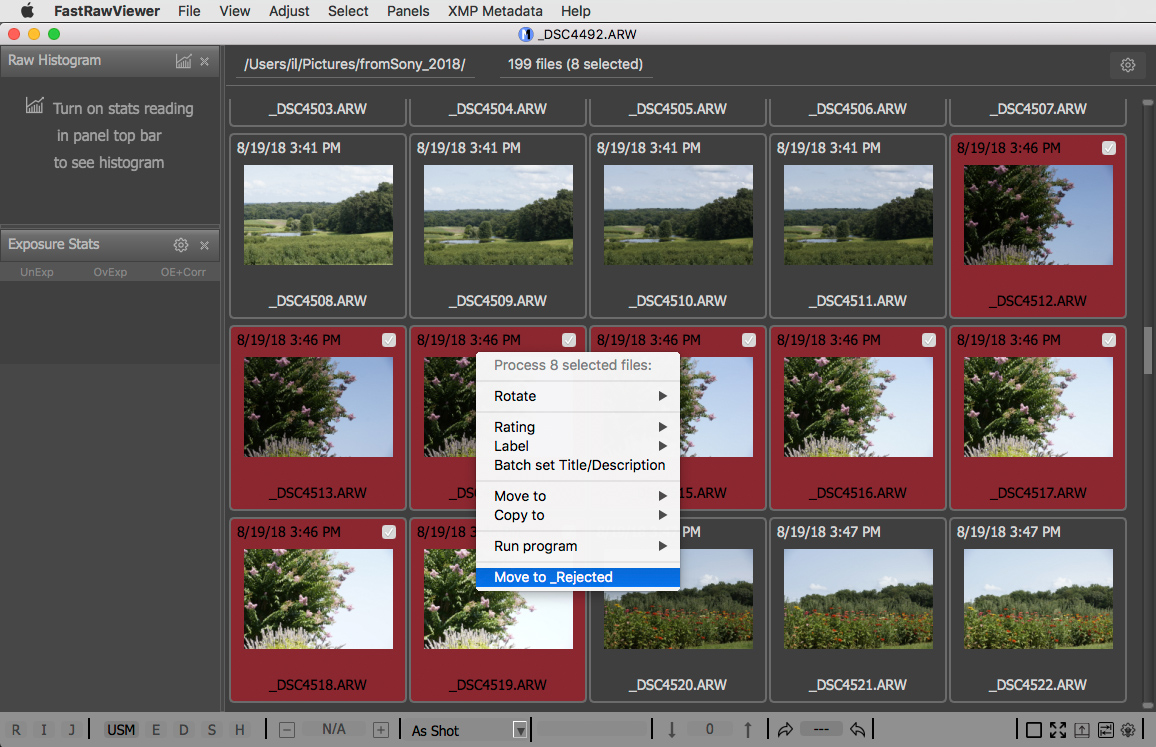
How to Assign Labels, Ratings, Titles, and Descriptions to a Group of Selected Files
- to set or clear XMP metadata to a group of files:
- right-click on any one of the selected files in the Filmstrip or in the Grid and choose from the drop-down menu the desired option
To reverse (undo) a setting rating and/or label operation use Ctrl+Z (if on a Mac, it is ⌘Z)
You can customize the label/rating system to your convenience.
Note: If your raw processor is set to use a language other than English; or you've modified the standard label names in your raw processor, please make sure the label names in FastRawViewer are aligned with the label names set in your raw processor. The place to change the label names in FastRawViewer is Preferences → XMP → "Ratings & Labels" → "XMP Label Style". For example, for German you may want to change the "XMP Label Style" to Custom and change "Red, Yellow, Green, Blue, Purple" to "Rot, Gelb, Grün, Blau, Lila".
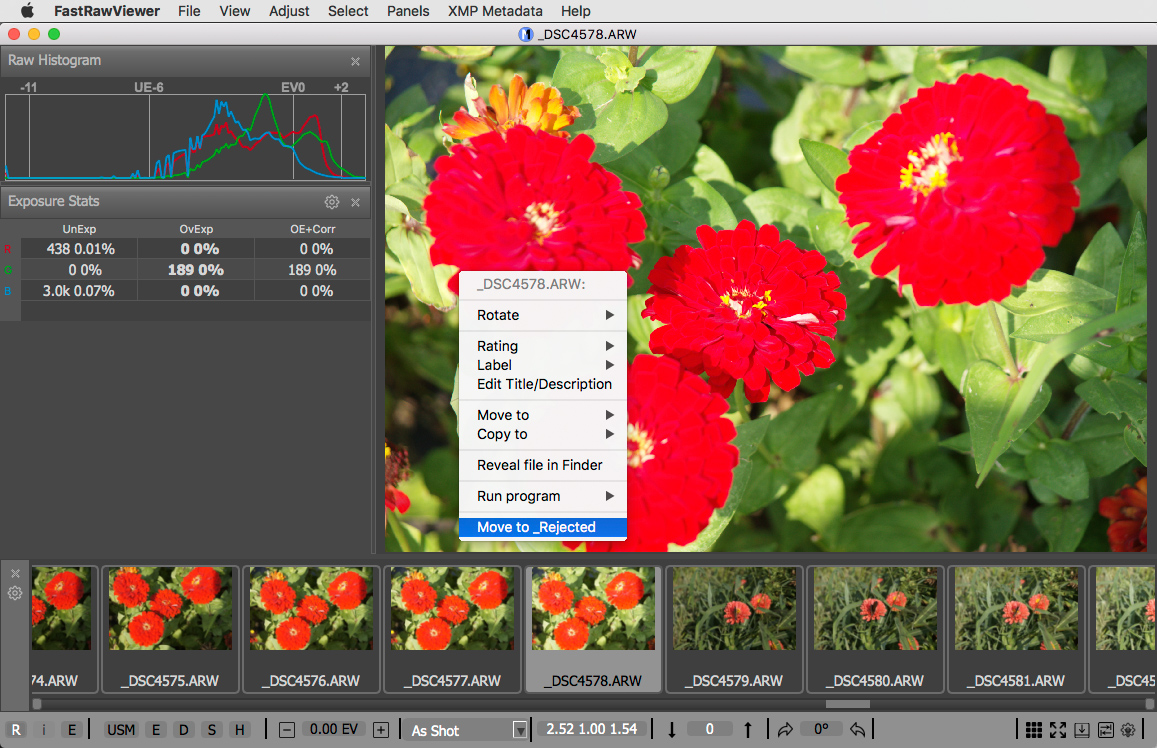
Move Questionable Photos to _Rejected Subfolder
If you are not sure that you want some of the copied photos to be processed in Adobe Lightroom right now, but still don't want to delete them right away, you can use the _Rejected subfolder.
Adobe Lightroom imports whole folders, and there is no way to force it to import files selectively from a folder. However, you may instruct Lightroom not to import from subfolders, unchecking "include subfolders" in the Lightroom Import dialogue.
One way to use this subfolder import control to your advantage is to perform a reject operation in FastRawViewer. This moves the unwanted files to a subfolder named _Rejected (by default, it is created inside the folder you are browsing ). Moving files to the _Rejected subfolder doesn't delete them – you can always move all or some of them back into the main folder. After you've made sure that the _Rejected subfolder contains only those files you are definitely not going to keep, you can clear the _Rejected subfolder. This operation moves rejected files to the trash bin, so you still have an option to restore them.
- To move the active file to the _Rejected subfolder:
- press Ctrl+Shift+Del or, for Mac, ⇧⌘⌫ (default shortcuts);
- or, right-click on this file and choose Move to _Rejected from the drop-down menu
- To move a group of selected files to the _Rejected subfolder right-click on a thumbnail for any of the selected files in the Filmstrip or in the Grid and choose Move to _Rejected from the drop-down menu
- To restore the last rejected file or the last rejected group of files from the _Rejected subfolder use Ctrl+Z (on Mac ⌘Z), or Menu → Files → Undo ...
- To restore files from the _Rejected subfolder, open it in FastRawViewer and move the files you want to restore to the designated folders
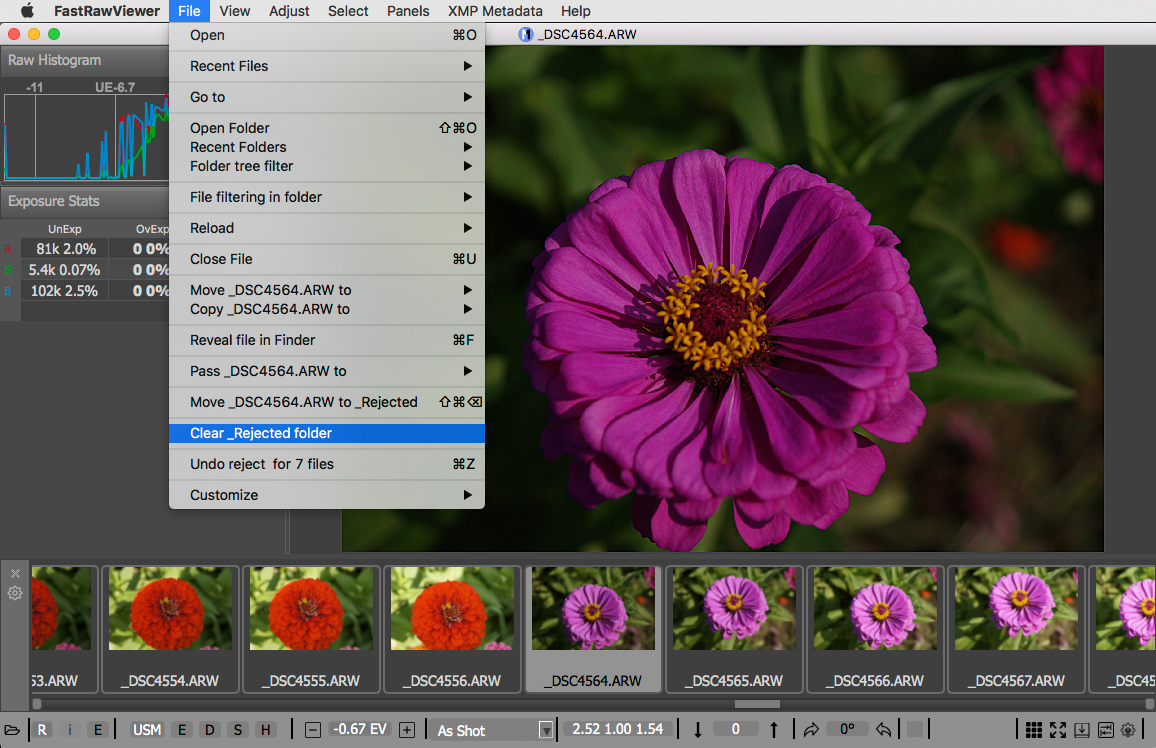
- To move files from the _Rejected subfolder to the trash bin use Menu → Files → clear Rejected folder
For more details, please read Deleting Files: the _Rejected subfolder
Move or Copy Photos to Different Folders / Subfolders
Please see above the instructions on how to copy a single file or a group of selected files. For Move operations follow the same instructions, just use the shortcut M instead of C as it was for Copy.
- Additional information that can help with using FastRawViewer specifically, and sorting photos in general, can be found at
- Working with single file
- Operations with multiple files
- Metadata: Ratings, Labels, Title, and Description and
- Undo: Reversing File Operations