How to Work with Image Archives the FastRawViewer Way
Enjoy the summer!
All LibRaw Products and Bundles - 25% off
Our Special Prices are valid until July 30, 2026.
How often do you want to visually browse your substantial archive of a huge collection of RAW files you've compiled over the years, in order to do some "thematic selection"? Or do you happen to have several folders of shots from some event (because, for example, two cameras were used to shoot it, or more than one card was in use), place, period of time (vacation), person, pet, etc., and you want to pick some shots out?
And after you've selected all those photos you need either to copy them into a separate dedicated folder (for further classification or processing), or onto a memory card (to give them to somebody), or you might want first add or edit ratings and labels to these files, or simply send them to a raw converter for processing and then save the results in designated locations.

We would like to suggest a workflow and introduce several tools to address one of the major recurring tasks, working with archives, with the goal to significantly simplify and speed up your work with huge collections of shots located in different folders and hierarchies of subfolders on your hard drive or a network server, as well as make said work less prone to errors.
There are a lot of different ways to work with archives, but, in order to get this done painlessly you would need tools allowing you to work with archives effectively. Of course, it's tempting to use databases. However, databases that contain full-size previews tend to grow uncontrollably, while without those previews the process becomes rather slow. Another not very welcome feature of databases is that they are relatively high maintenance objects, demanding proper backup policies.
Forgoing both the complications and benefits databases offer, we decided to capitalize on the fast rendering FastRawViewer provides (of course, it depends on the speed of access to raw files) and implemented a more lightweight but pretty powerful approach.
Approach Based on Filelists (Lists of Shots)
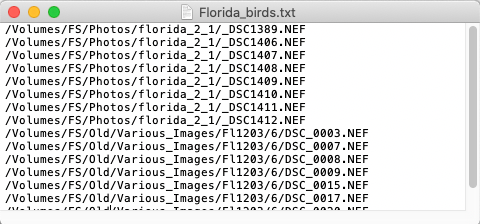
Our approach is based on Filelists: lists of shots, stored as plain text files: each line of such a filelist is a full path (location in a file system) to some shot you decided to place in this filelist; each filelist is stored in a location chosen by a user. Filelists serve two purposes: to restore/replace/append selections (that is to mark as selected shots from the list) or to load and display only those files that are in the list.
If you open such a filelist in a text editor, you can see that it is a simple text file, one full path to a file per line (if the paths contain non-Latin characters, then the filelist must be saved in the user’s locale).
- With the help of filelists, FastRawViewer allows to:
- Create a filelist based on the paths to the shots that are currently selected, or append to an existing filelist, adding the paths to currently selected files;
- Outside of FastRawViewer, filelists can be:
- created and edited manually using any text editor,
- generated programmatically based on, say, matching certain EXIF tags.
- Load any properly formatted filelist, appending the shots listed to the currently selected shots, or replacing the current selections with those listed.
- Use such a filelist to open only the shots listed.
- In this case filelists are treated as virtual folders and become specific collections based on a theme, event, or other criteria.
Of course you can use such filelists on a temporary basis, but you might want to store some of the filelists for later re-use, and if you do, it becomes a snap, say, to re-send the same files: just load the necessary filelist, creating a virtual folder, and you can copy those files to the designated physical place / media in one move. You may also find it beneficial to store filelists in a dedicated location of your choosing.
Filelists can contain paths to files in RAW formats as well as other image formats such as HEIC / HEIF, JPEG, PNG, TIFF.
FastRawViewer Tools to Work with Archives of Image Files (Summary)
- Based on feedback and feature requests, we've added tools to address many of the typical and time-consuming tasks photographers face while working with archives:
- Subfolder Browse Mode - to quickly and easily browse through folders and subfolders without opening each of them separately
- Tools to work with lists of shots:
- Save / Append a selection to a file (to work with these shots later)
- Load / Append a selection from a file (to restore selection marks on the previously selected shots saved to a filelist or add more shots to current selection of shots),
- Filelist Browsing Mode (Virtual Folder Mode) - to open only shots from a filelist as if they all were located in the same folder,
- Sorting and Filtering files to be displayed
- and of course standard operations with selected files - copy, add / edit ratings, labels, titles and descriptions and send to a raw processor directly from FastRawViewer.
Please keep in mind that under the name "archive" we understand some set (doesn't matter how big or small this set is) of folders with sophisticated hierarchy of nested subfolders containing somehow sorted RAW files; we assume that archives are "static" and contain only the shots you don't intend to delete (either "keepers" only, or it's just a "backup of everything" and you want to add some shots from it to the archive of "keepers"), nothing inside the source hierarchy is going to be moved, added, or removed.
Thus in this article we don't cover any operations changing the structure or a content of your archive - such as adding files or folders to archives and moving files between folders and subfolders.
Subfolder Browse Mode - to Browse through Archive without Opening Every Subfolder Manually
Subfolder Browse Mode has been implemented since FastRawViewer 1.6.
In Subfolder Browse mode, the shots found in the nested folders will be presented as a “flat list.” You can browse through these shots without opening each subfolder separately. Sorting is possible both by the “full path” and also by just the filename.
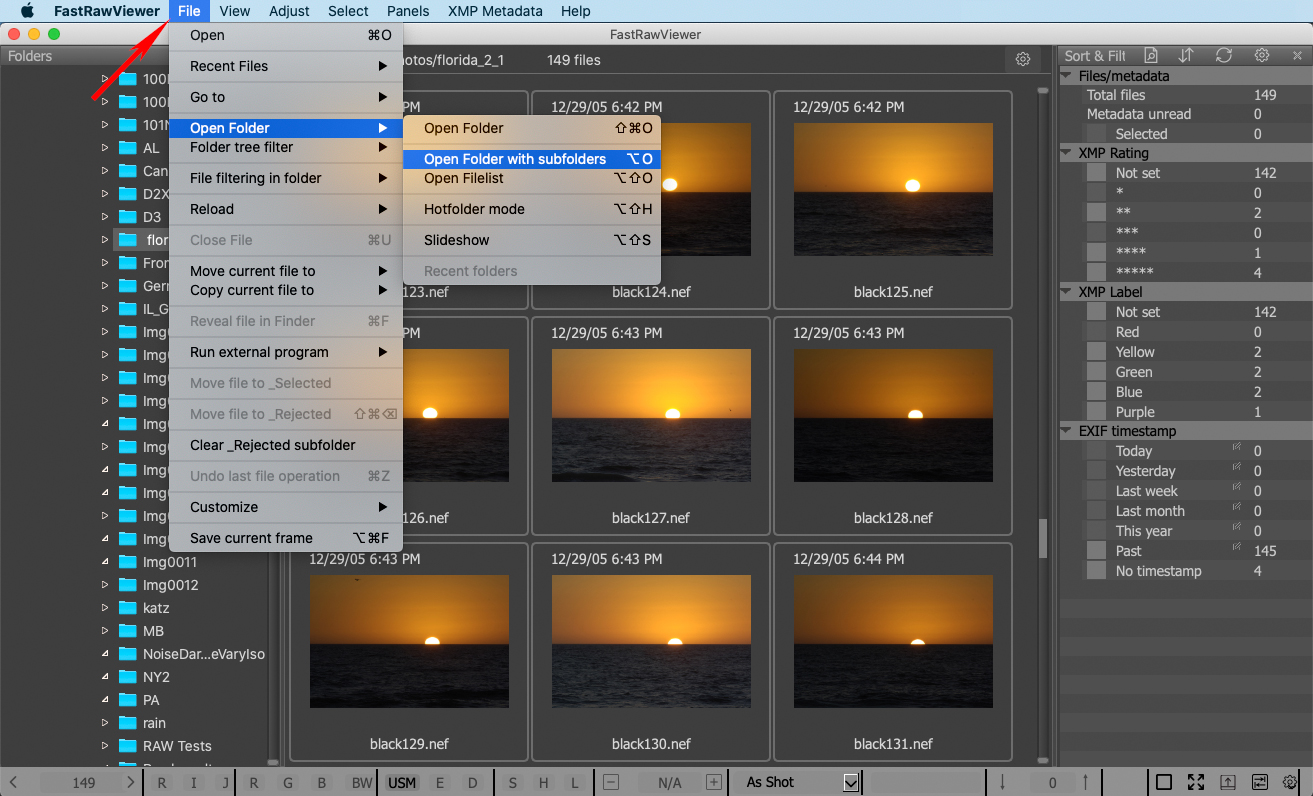
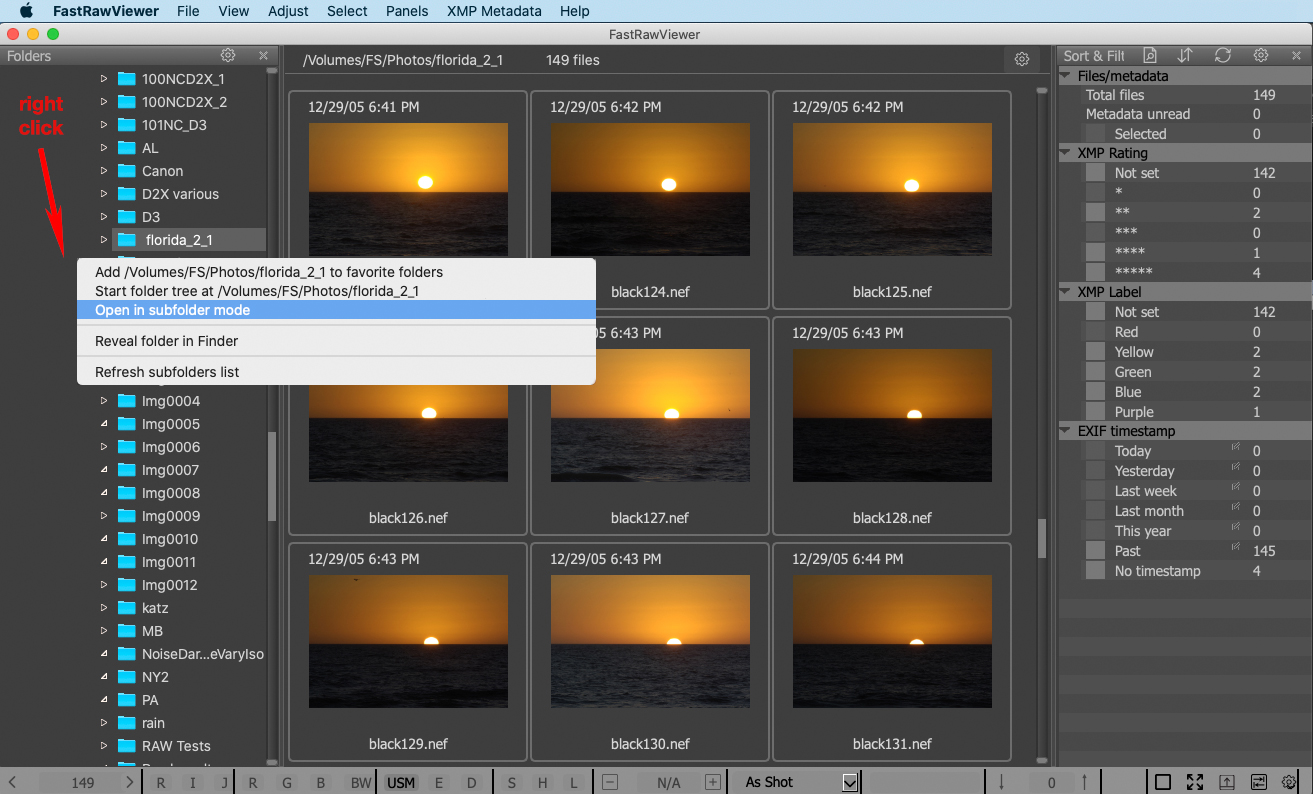
- Switching to Subfolder Browse mode can be done by:
- Menu – File – Open Folder – Open folder with subfolders (Alt-O / Option-O in Windows/Mac)
- Context menu: right-click on the Folders panel then Open in subfolder mode
In both cases, a dialog for scanning the subfolders will appear:
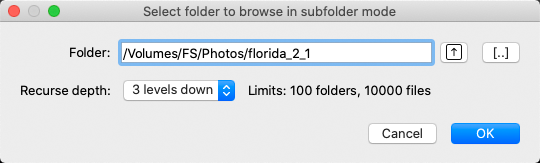
In this dialog, the user picks the initial folder for browsing (clicking on the arrow up allows one to easily go a level up) and the depth of browsing. The limits are set through Preferences – Special browse modes - [Subfolder browse mode] section.

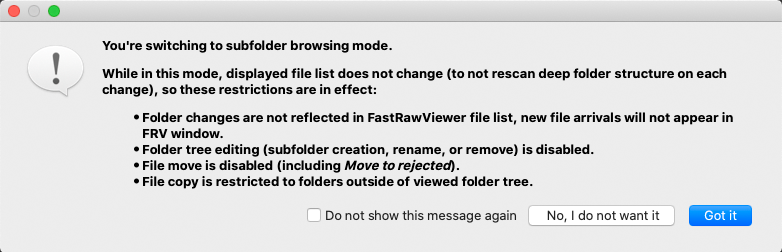
- Subfolder Browse mode is kind-of "read-only"; after switching to Subfolder Browse mode, the list of displayed files will be fixed (to not have to re-scan a deep subfolder tree every time), so FastRawViewer’s functionality is constrained in this mode:
- Moving files (including Move to _Rejected) is forbidden (because moving inside the tree being viewed only leads to changing the file sorting, and moving outside the tree would require a long re-scan of all of the nested folders).
- Copying files is permissible only outside the folder tree being viewed (for the same reasons as above).
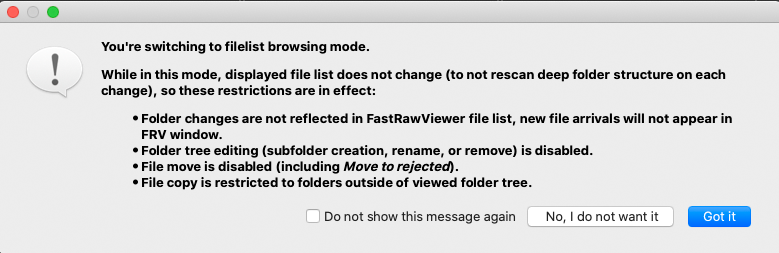
To remind you about all of the limitations of Subfolder Browse mode you will be shown a warning before switching, and will have to confirm that you want FastRawViewer to switch to this mode
- Exiting subfolder browse mode can be done in the following ways:
- Explicit exit: Menu – File – Open File or Menu – File – Open Folder – Open Folder
- Implicit exit: dragging and dropping (a file or folder) into the application window, selecting a folder in the Folders panel.
- When exiting implicitly, FastRawViewer will query to make sure you want to do this (this can be tuned through Preferences – Special browse mode).
A detailed description of how to set up Subfolder Browse mode according to your preferences can be found in the User Manual -> Special view modes for folders or in Subfolder Browse Mode
Having all of the files contained in the chosen folder and all of its subfolders in front of you, you can start working with those files.
Select, Copy, Add / Edit Ratings, Labels, Title and Description
- Here you can find:
- How to start a selection, add/remove a single file or a sequence of consecutive files to the existing selection, inverse selection and deselect all.
- How to Add / Edit Labels, Ratings, Titles and Descriptions
- How to Copy Selected Files
How to Send Selected Files to an External Program for Processing
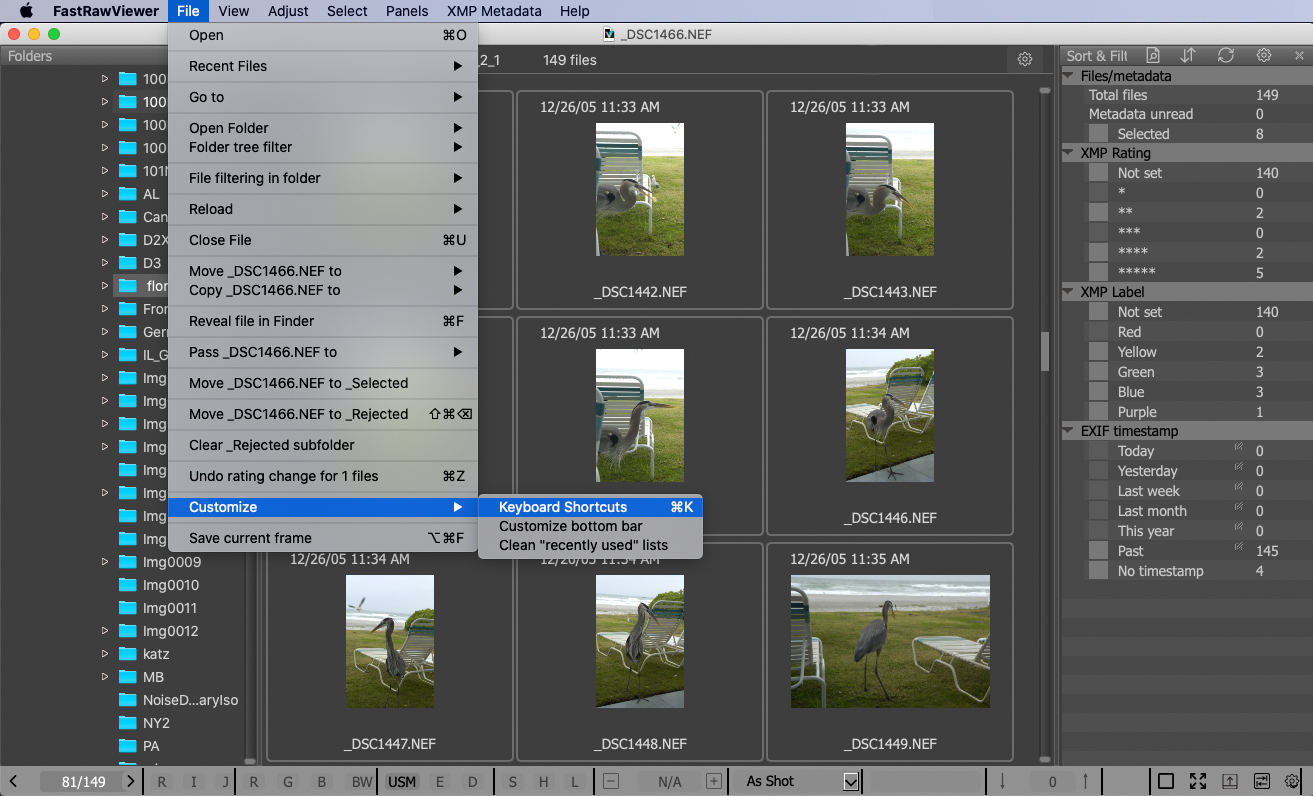
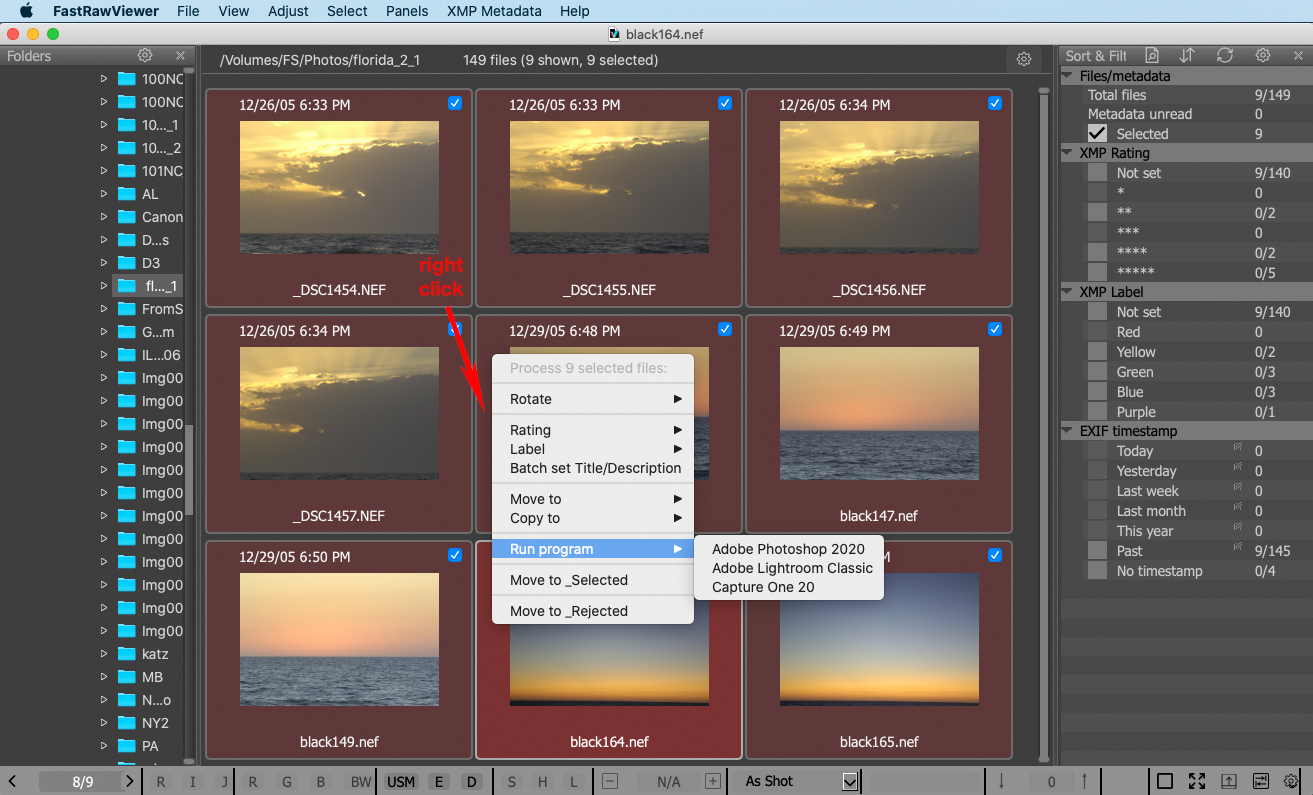
- To send selected files to external raw converter (or another raw processing application) you can use:
- Menu - File - Pass n files to ... - choose the application name from the drop-down menu or
- Use Context menu: right-click on the Grid or Filmstrip panel then Run Program.
- To add / edit a list of the external programs you would like to use:
- File - Customize - Keyboard shortcuts - External Editors
You can read more about setting a list of external programs in User Manual -> Working with a Single File -> Integration with External Programs.
Tools to Work with Filelists
Save / Append Selection to File
When you've finished selecting the shots you need, or you want to take a break without risking to lose the selections you've already made, you can save the list of files you've selected as a filelist or append it to the existing filelist - to load the resulting list later and thus to re-select the shots.
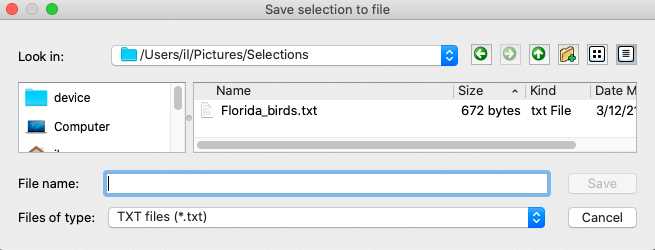
- Menu - Select - Save selection to file
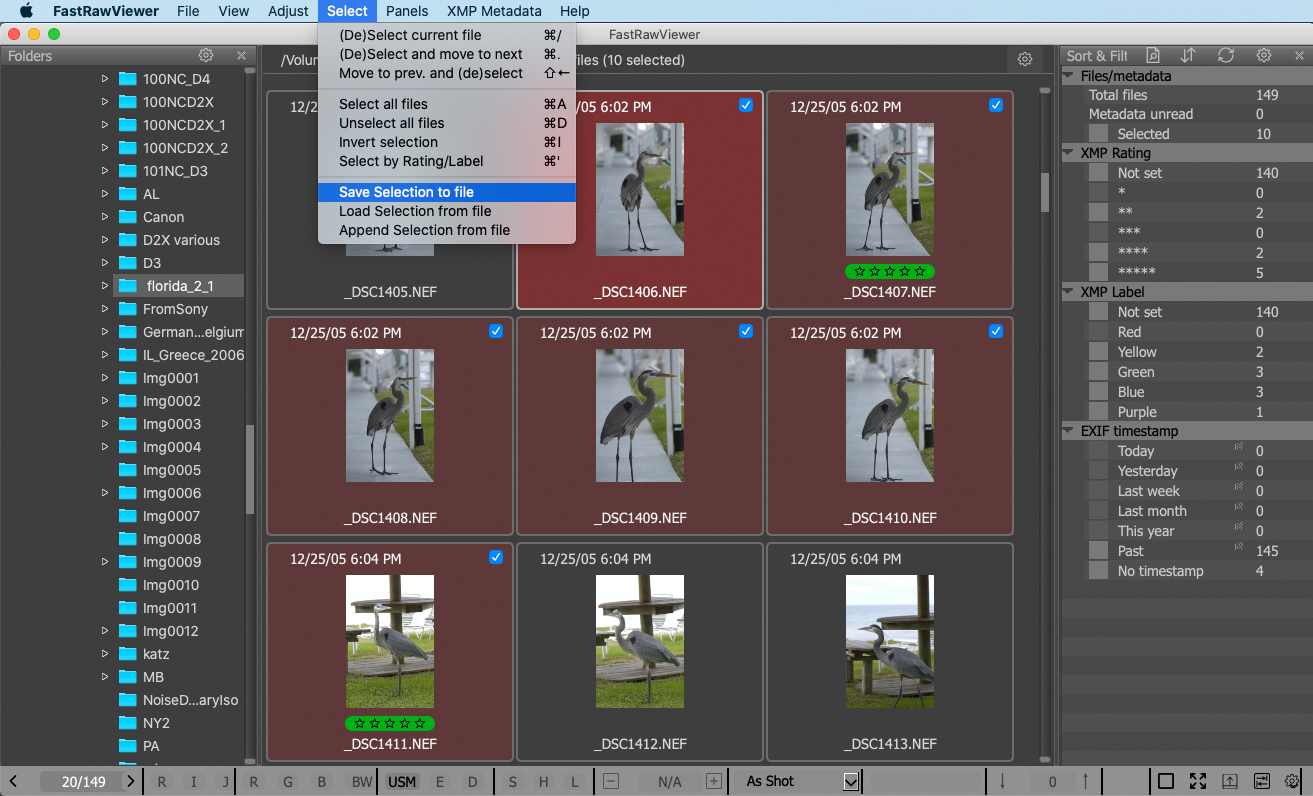
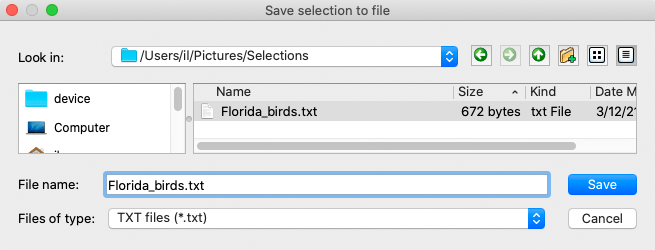
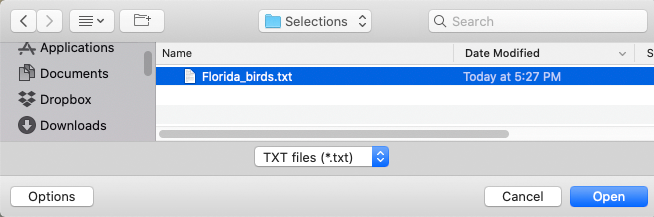
When you push Save selection to file a "Save..." dialog window will appear, in which you can choose where you want to save your selection and under what name:
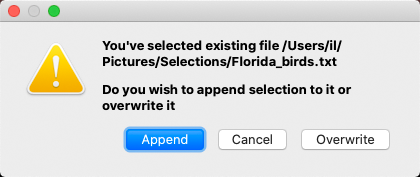
If you choose an existing filename,
another dialog will appear, so that you can specify if you want to append the new selection to the existing one or if you would prefer to overwrite it.
If after a break you want to continue working with the saved selection right were you stopped, or you've manually or programmatically created a list of files according to some criteria, you can:
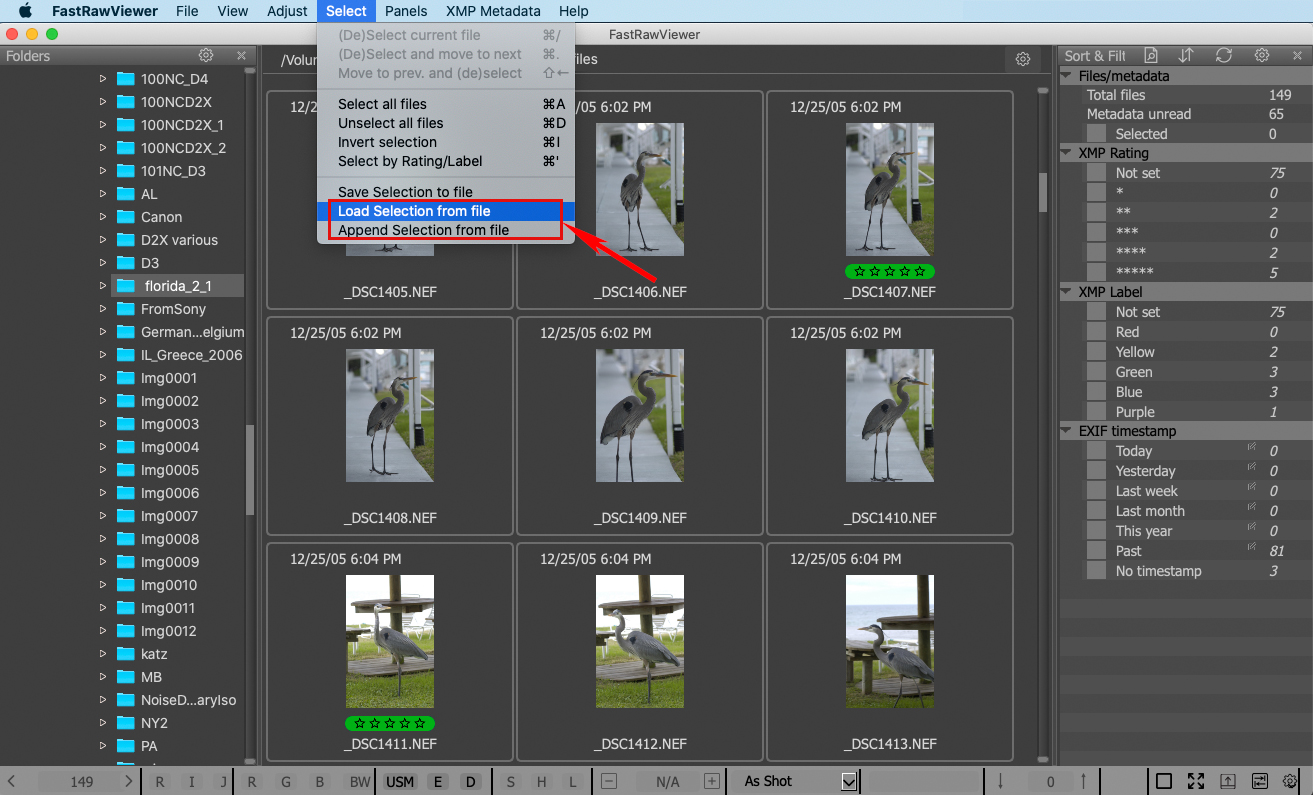
Load Selection from File / Append Selection from File
This operation will automatically restore selection marks based on the filelist. If you currently have some files marked as selected, then the Load operation will override your current selection, while the Append operation will combine the current selection with the selection from the filelist.
- Menu - Select - Load selection from file / Append selection from file
... and then choose the filelist you need using a popup dialog window.
It will either load the list of marked files from the previously saved selection and mark the corresponding files as selected for the load operation, or add those files to the list of the currently marked-as-selected files for the append operation.
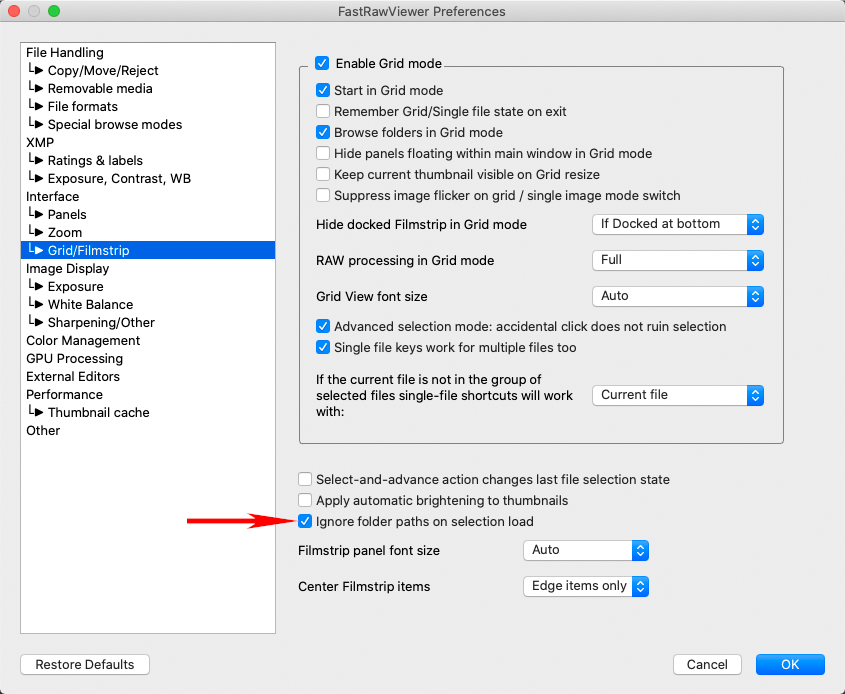
- As we have shown above, every filelist is just a text file, containing a simple list of filenames with full path, one file per line. With default settings, the full path is checked against the list of currently displayed files, so selection lists are bound to specific folder. If you want selection lists to become folder independent, that is, when only the filename part is checked against the list of currently visible files, choose the following option:
- Preferences - Grid / Filmstrip - Ignore folder paths on selection load
You can read more at User Manual -> Operations with Multiple Files -> Advanced selection mode
Filelist Browsing Mode (Virtual Folder Mode) - To Load Only Shots from a FileList
You can use a filelist to open only the files listed. To do so you need to switch FastRawViewer into Filelist Browsing Mode. In this mode FastRawViewer treats a filelist as a virtual folder.
Filelist Browsing Mode (Virtual folder mode) has been implemented since FastRawViewer 1.6.
This mode is analogous to subfolder browse mode: the file list is fixed, so moving files is forbidden, and copying can only be done to a folder different from the folder the file is currently located in.
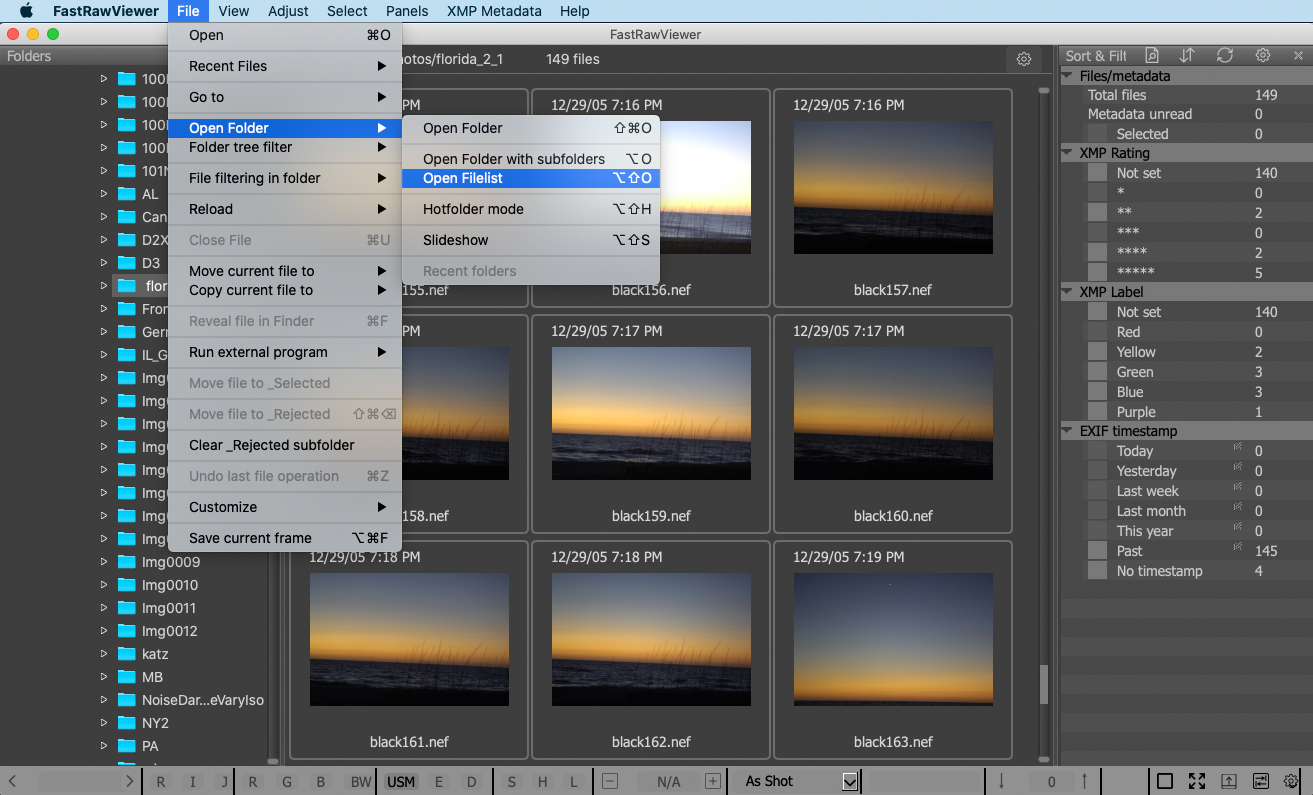
- To switch to this mode, one can use:
- Menu – File – Open Folder – Open Filelist (Alt-Shift-O / Option-Shift-O Windows/Mac)
... and then choose the filelist using a popup dialog window.
- or Drag and Drop a filelist into the program window; the filelist should have the extension indicated in Preferences – Special browse modes - [Subfolder browse mode section] – Treat files with these extensions as file lists.
To remind you about all of the limitations of Filelist Browsing Mode you will be shown a warning before switching, and will have to confirm that you want FastRawViewer to switch to this mode
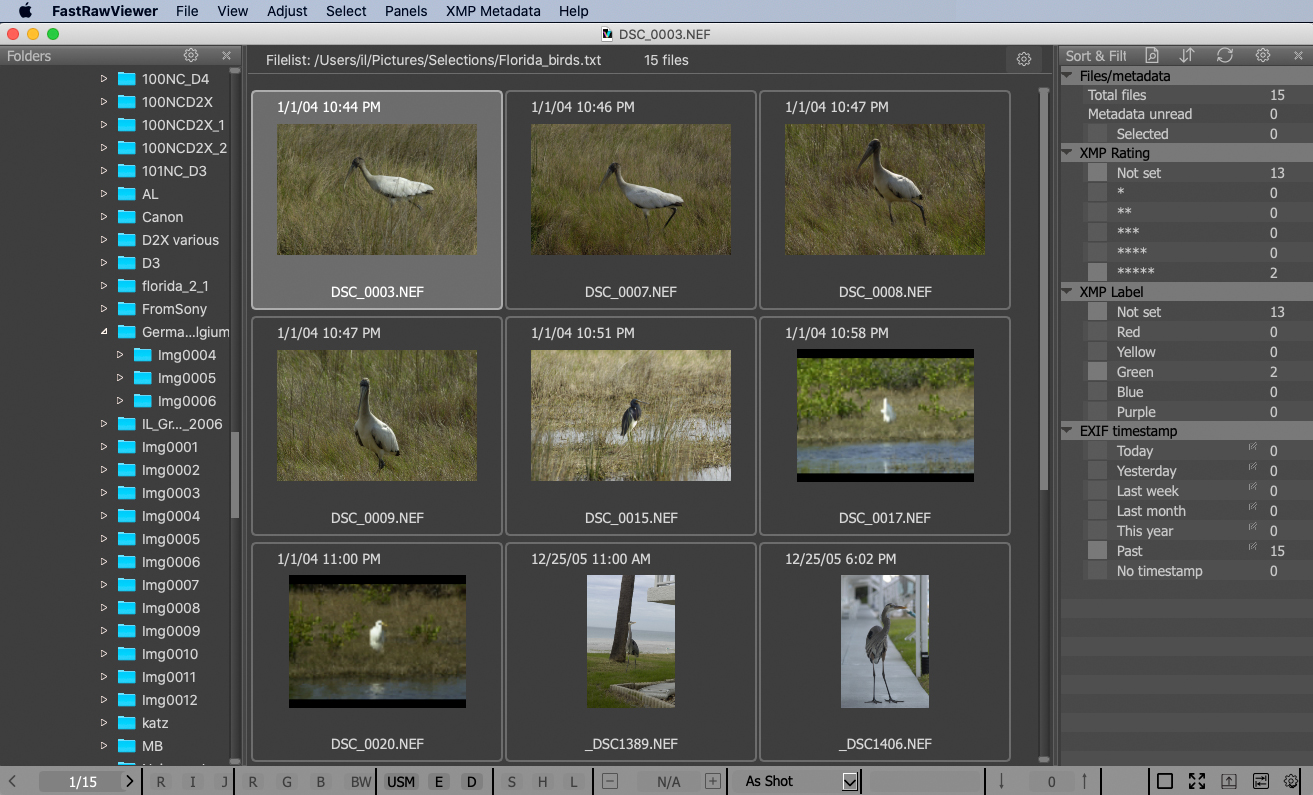
If you confirm switching to this mode, FastRawViewer will display only files from the list, as if they were located in the same folder.
Sorting and Filtering Files - to Sort or Limit Number of Shots to be Displayed
When you are browsing a real or virtual folder, you can limit the number of displayed files, by filtering them according to some criteria.
Sorting and Filtering Files has been implemented in FastRawViewer since version 1.4
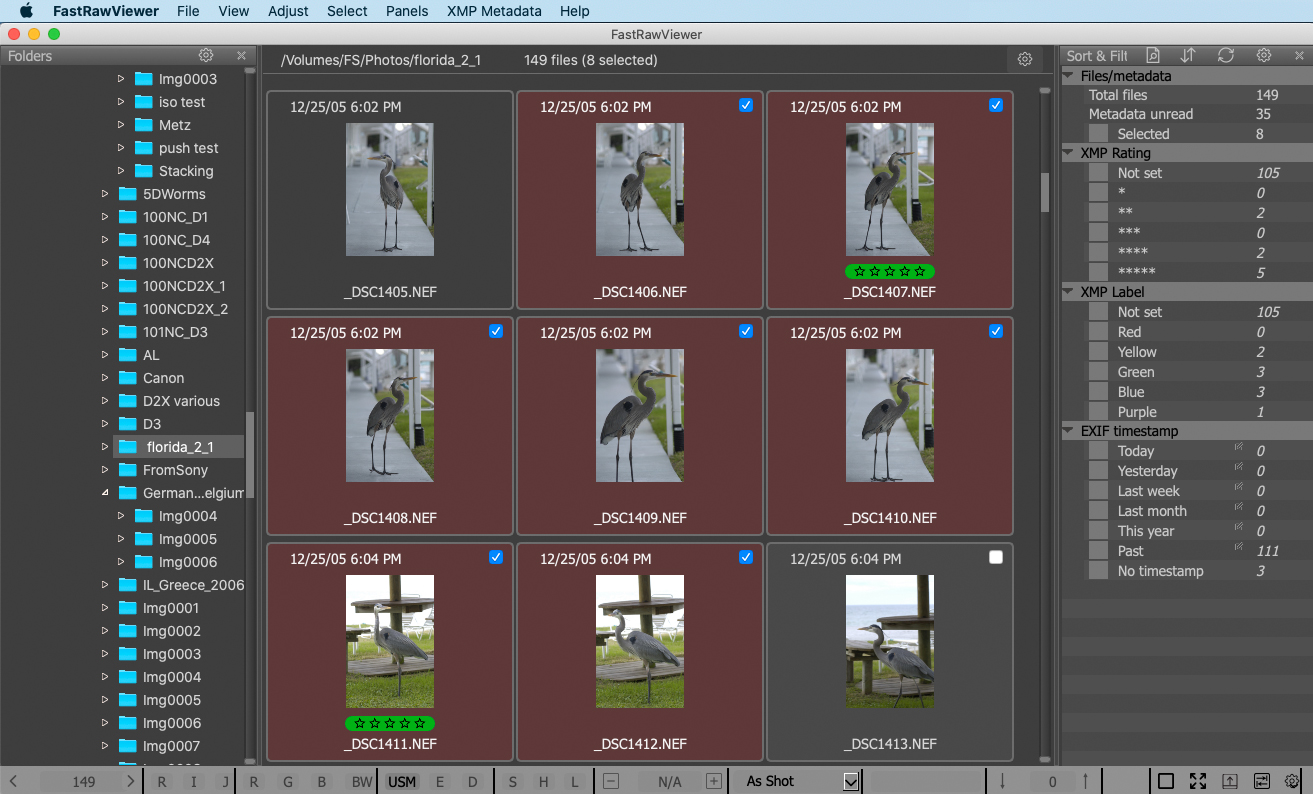
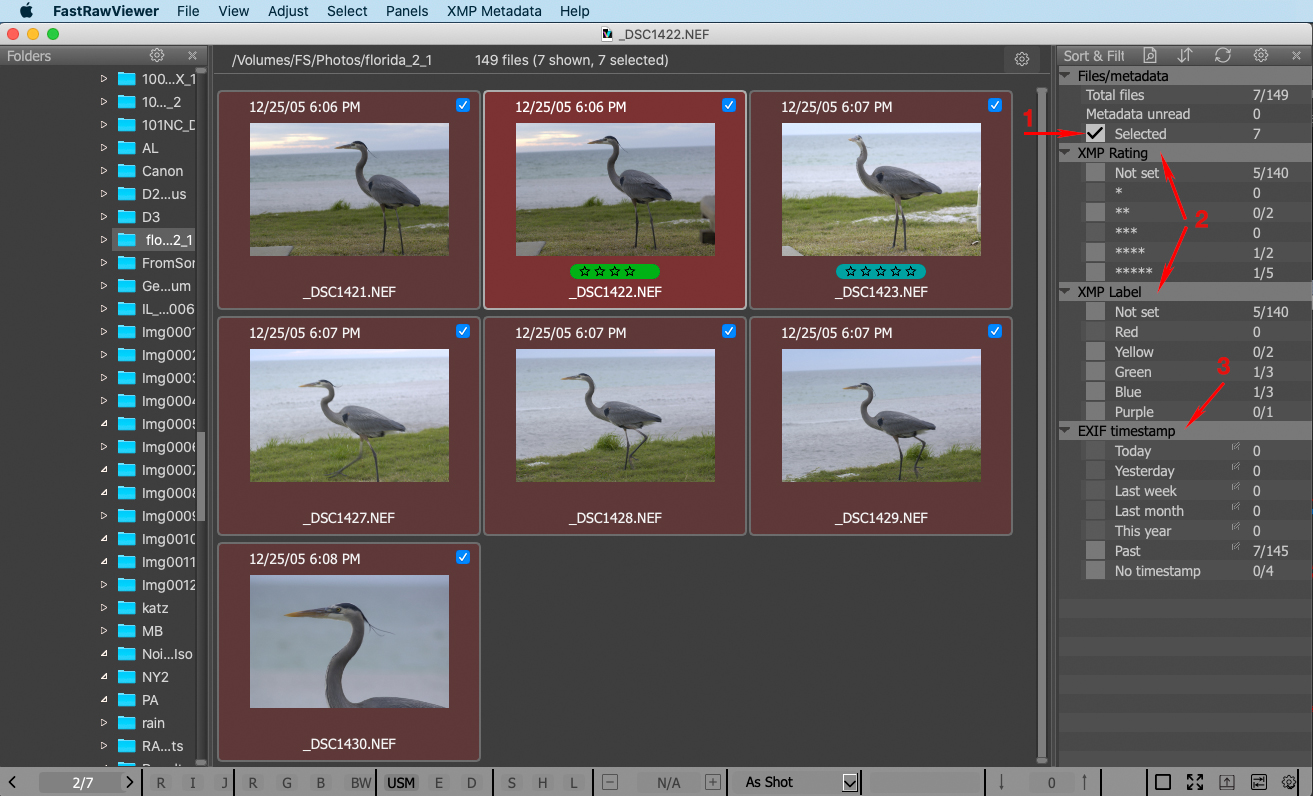
Using the Sort & Filter panel you can choose a filtering parameter, and only files that pass the filtering conditions will be displayed.
The parameters are (please see the picture below):
- Selected - If there are any selected files in the folder, you can check the checkbox to the left of the word Selected, and only the selected files will be displayed.
- XMP Rating/XMP Label
- Exif Timestamp
A detailed description can be found in User Manual -> Sorting and filtering files in a folder -> File filtration.
Keyboard Shortcuts
- Please don’t forget that nearly all of the operations mentioned above have default shortcuts assigned to them. You can always change those shortcuts according to your preferences using the Keyboard Shortcut editor which can be reached via:
- Menu - File - Customize - Keyboard shortcuts or Cmd-K / Ctrl-K