Working with a Single File
While in Grid mode, the following operations can be carried out with a file:
- Switching to single-file mode: double-click or Menu – View – Switch to single image or pressing Enter (if the keyboard focus is on the window with the file previews).
- Rotation (Menu-Adjust-Rotate), the new orientation data will be recorded in the XMP-file (see below).
- Assigning a rating/label (Menu – XMP Metadata), if changed, the rating and label will be recorded into an XMP-file.
- Copying (Menu – File – Copy), moving (Menu – File – Move), copying to the _Rejected files folder, which is for those, which you may want to delete at a later stage (see below).
- Sending a file for processing in an external program (Menu – File – Pass filename to).
- Display of a file in a system file manager (Menu – File – Show in Explorer/Reveal in Finder).
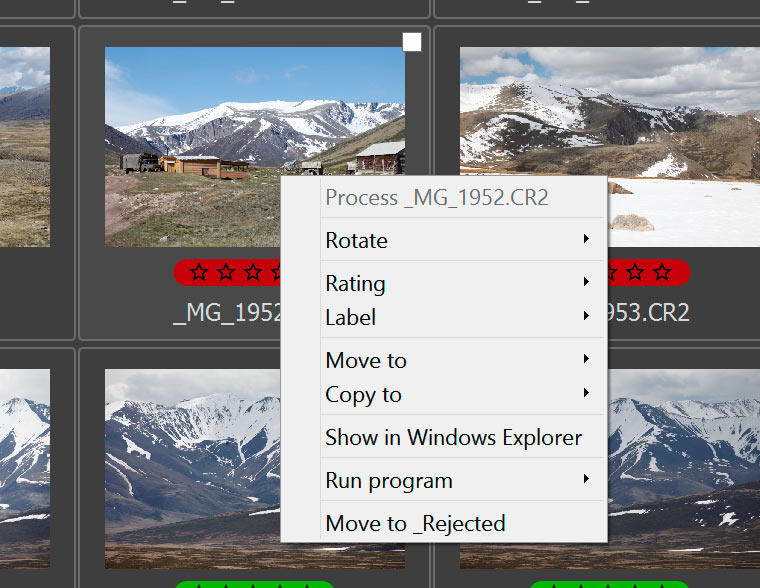
These same actions (except for switching to single file mode) are accessible through the context menu which is activated with a right-click:
Copying and Moving Single Files
The current (highlighted) file in the Grid View can be copied to another folder with Menu – File – Copy filename to – [Select Folder] (or pressing C). The dialog to select the destination folder will appear, and after the destination folder is selected the file will be copied.

The names of the folders which were used for copy operations are stored in the menu items below Menu – File – Copy .. to – [Select folder]. The most recent copy destination is at the top of this list, below are the folders which were used earlier. The list can contain up to five folders.
All of the folders in this list can be accessed through the keyboard (C, Shift-C, etc.), which allows one to conveniently copy to those destinations without accessing the menu.
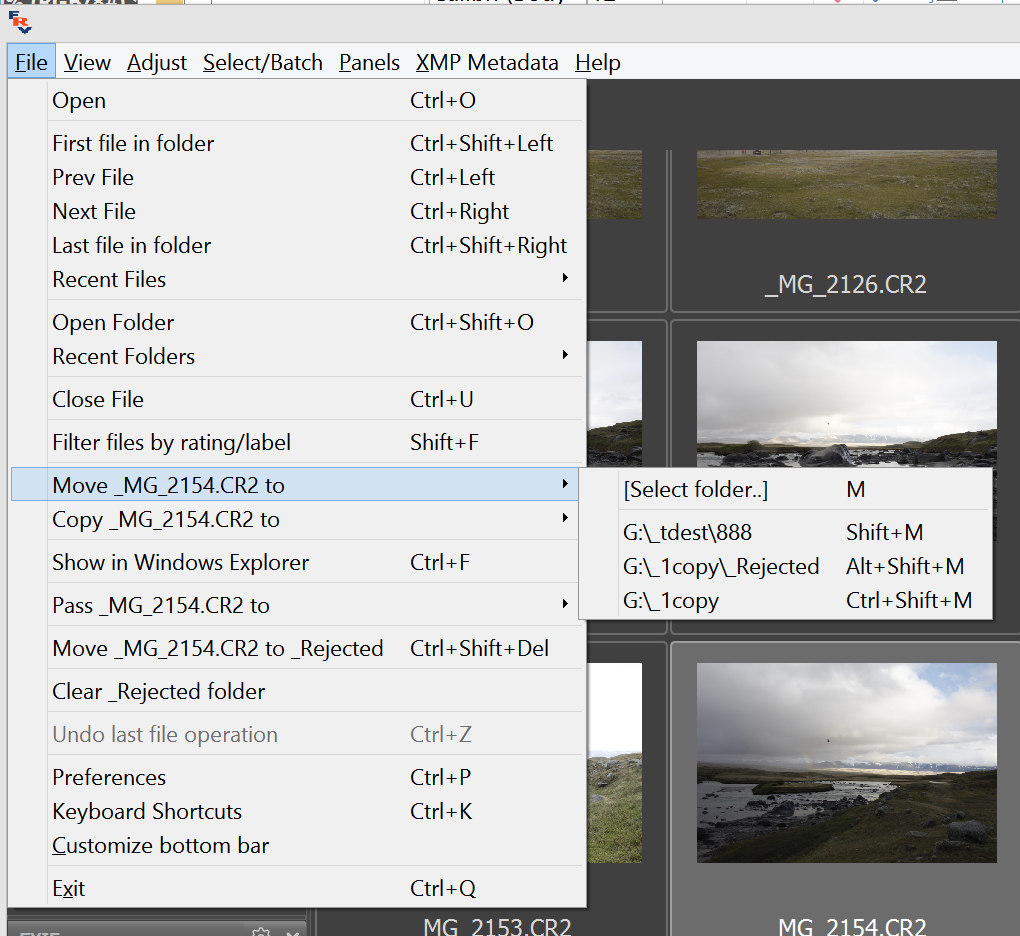
Moving files works much the same way: after a file is moved to a destination via the (Menu – File – Move .. to – [Select folder] or pressing M) the path to this destination folder will be stored as an element of the menu under [Select folder], and can be used in the future without subsequently choosing the destination, using the following dialog:
The lists for copy and move destinations are kept separately.
Copy and move operations work not only over the RAW file, but also copy/move the following to the same destination:
- External JPEG-file (in RAW+JPEG mode).
- XMP- sidecar file (if it exists).
- .rpps sidecar file (if .rpps sidecar file recording is turned on).
- Other files according to the setting Preferences – Copy/Move/Reject - Additional file extensions to copy/move with file. This setting is described in more detail in the section Program Settings – File Handling - Copy/Move/Reject.
When doing sensitive work and/or using unreliable media, the Preferences – File Handling - Copy/Move/Reject - Verify file contents after copy setting may come in handy, as it turns on data verification after copying.
Resetting the lists of recently used folders
The folders that served as destinations for copy and move operations are organized in lists that are accessible through Menu – File – Move/Copy (and are also accessible through context menus).
To reset those lists, use Menu – File – Customize – Clean “recently used” lists. If this action is requested, FastRawViewer will issue a prompt asking to select which lists to reset:
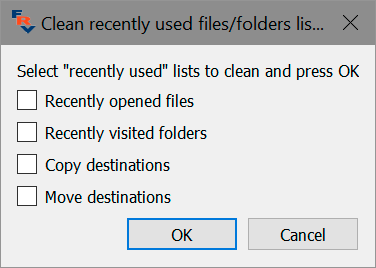
Please put checkmarks next to the names of the lists you want to reset.
Fast Copying/Moving into a subfolder in the current folder
FastRawViewer supports a separate mode to quickly copy/move a file (or files, see below) into a subfolder in the current folder.
To use this mode, it first has to be turned on via the setting Preferences – Copy/Move/Reject – Enable Quick copy-move to subfolder. After being turned on:
- A new element will appear in Menu – File – Copy, Menu – File – Move [called New Subfolder]
- The same element will appear in the Copy and Move context menus
- This action will also be accessible through the Alt-C hotkey (for Copy)/Alt-M hotkey (Move)
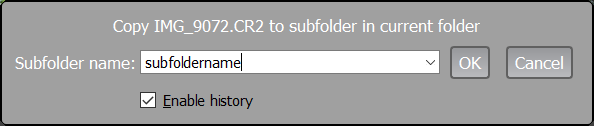
When using one of the menu points listed above/hotkeys, a dialog to enter the name of the subfolder into which the file is to be moved or copied will pop up:
After entering the subfolder name:
- If it doesn’t exist, it will be created in the current folder;
- The selected file will be copied or moved into it (if it’s a group of files, see below).
If one leaves Enable history checked, then the folder names that were used are remembered for the current session (but not between the sessions) and when pressing the “arrow down” key, are available for selection for the subsequent copy/move actions:
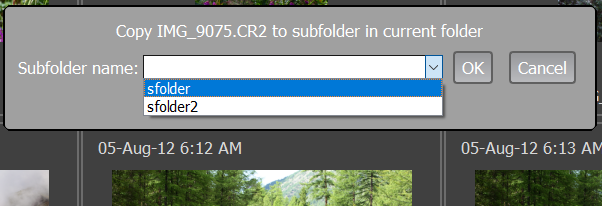
The history of used subfolders is the same for copying and for moving.
Deleting Files: the _Rejected folder
FastRawViewer doesn’t allow one to delete files directly from the current folder. Instead, the files you intend to delete can be moved to a _Rejected subfolder, located in the current folder. This folder is created the first time a user requests that a file be moved to said folder. This is intentional, and exists to ensure that no shots are accidentally deleted:
- There are many situations when the system “trashbin” can’t be used (removable drives, network folders and drives); also, in certain cases the operational system may delete part of the content of the system trashbin (for example, when the size of the trashbin is over the limit) without even requesting confirmation from the user.
- Flash cards and card readers are prone to hardware malfunctions, and moving a file into a subfolder is the safest file operation.
To delete files, after you are sure nothing is in to the _Rejected folder, which shouldn’t be (the _Rejected folder can be browsed with FastRawViewer as any folder), you can use the Clear _Rejected Folder operation (see below)
By default, the _Rejected folder is a subfolder of the current folder (i.e., each folder has its own _Rejected subfolder). In certain cases, this may be inconvenient. To address this, you can use a global _Rejected folder by changing the preferences in Preferences – Copy/Move/Reject:
- Use global rejected folder – Check.
- Select the path for the Global Rejected Folder.
Clearing out the _Rejected Folder
To delete the contents of the _Rejected folder, use Menu – File – Clear _Rejected folder.
Clearing the folder with rejected files is irreversible, so
- You cannot set a hotkey for the Clear _Rejected action.
- When choosing this action, an additional, un-turn-off-able warning will be displayed:
![]()
The OK button will only be accessible after checking Yes, I’m sure checkbox.
Show in Explorer button (Mac: Reveal in Finder) allows one to look at the content of _Rejected folder using the file manager.
The additional Delete read-only files too checkmark allows one to delete files with the Read-Only attribute; if this checkmark is not set then those files will be ignored and will remain in _Rejected.
The additional Remove _Rejected subfolder too checkbox allows one to delete the _Rejected folder itself as well.
If Preferences - Copy/Move/Reject - Show detailed _Rejected folder stats before clearing the folder setting is checked, then a more detailed statistics for the files to be deleted is displayed (number of RAW files, number of RAW+JPEG pairs, etc.):
![]()
Attention: Mac OS X does not support the Read-Only attribute on the FAT/exFAT systems, so on OS X the Read-Only checkmark will only work on local and network drives, but will not work (i.e. checked on) on removable media (memory cards).
Note: Menu – File – Clear _Rejected is not available if global rejected folder is used.
File selection: _Selected Folder
The _Selected Folder is a way to quickly move the selected files into a sub-folder (analogous to the _Rejected subfolder, except the purpose is the opposite). Here are the differences between the familiar _Rejected folder mechanisms, and the new _Selected folder mechanisms:
- By default, this feature is turned off; it needs to be turned on through Preferences – Copy/Move/Reject – Enable move to _Selected folder; this is the same place where the name of the subfolder is set.
- The hotkey for moving files to _Selected is not set by default, it needs to be manually assigned through the hotkey editor in the File Copy/Move/Reject section for hotkeys (see the section on “Setting the keyboard shortcuts” in this Manual).
- The _Selected folder is always a subfolder in the current folder (if you want to use a global folder for this type of operation, you should opt for File – Move To – and select the last used folder, or use the hotkey Shift-M)
- There is no operation analogous to Clear _Rejected Folder.
Integration with External Programs
FastRawViewer can start external programs, passing them the current RAW file as a parameter.
This way any program that takes the file name as a command line parameter can be launched, be it a RAW convertor, different image viewer, or whatever program you may need.
On the first run, FastRawViewer performs a search and automatically configures itself to use the following programs:
- RawDigger
- Adobe Photoshop
- Adobe Lightroom
- Raw Photo Processor
- Capture One
- DXO Optics Pro
If, on the first run, FastRawViewer was unable to find the program you need, it can be added to the list of external programs manually through Preferences – External Editors.
To launch an external program to process the currently displayed image you can use Menu – File – Run – necessary program or with press one of R for the first external program, Alt-R for the second, and Ctrl-R for the third.
Display of the current file in Windows Explorer (on Windows) /Finder (on Mac) can be done through Menu – File – Show in Windows Explorer / - Reveal in Finder. Default keyboard combination – Ctrl-F.