First Launch and Program Activation
Activating the Trial Version
During the first run FastRawViewer will display a splash screen suggesting the activation of the trial version.

Immediately after that, with the main program screen being opened, FastRawViewer will try to connect to Internet to activate the trial version:
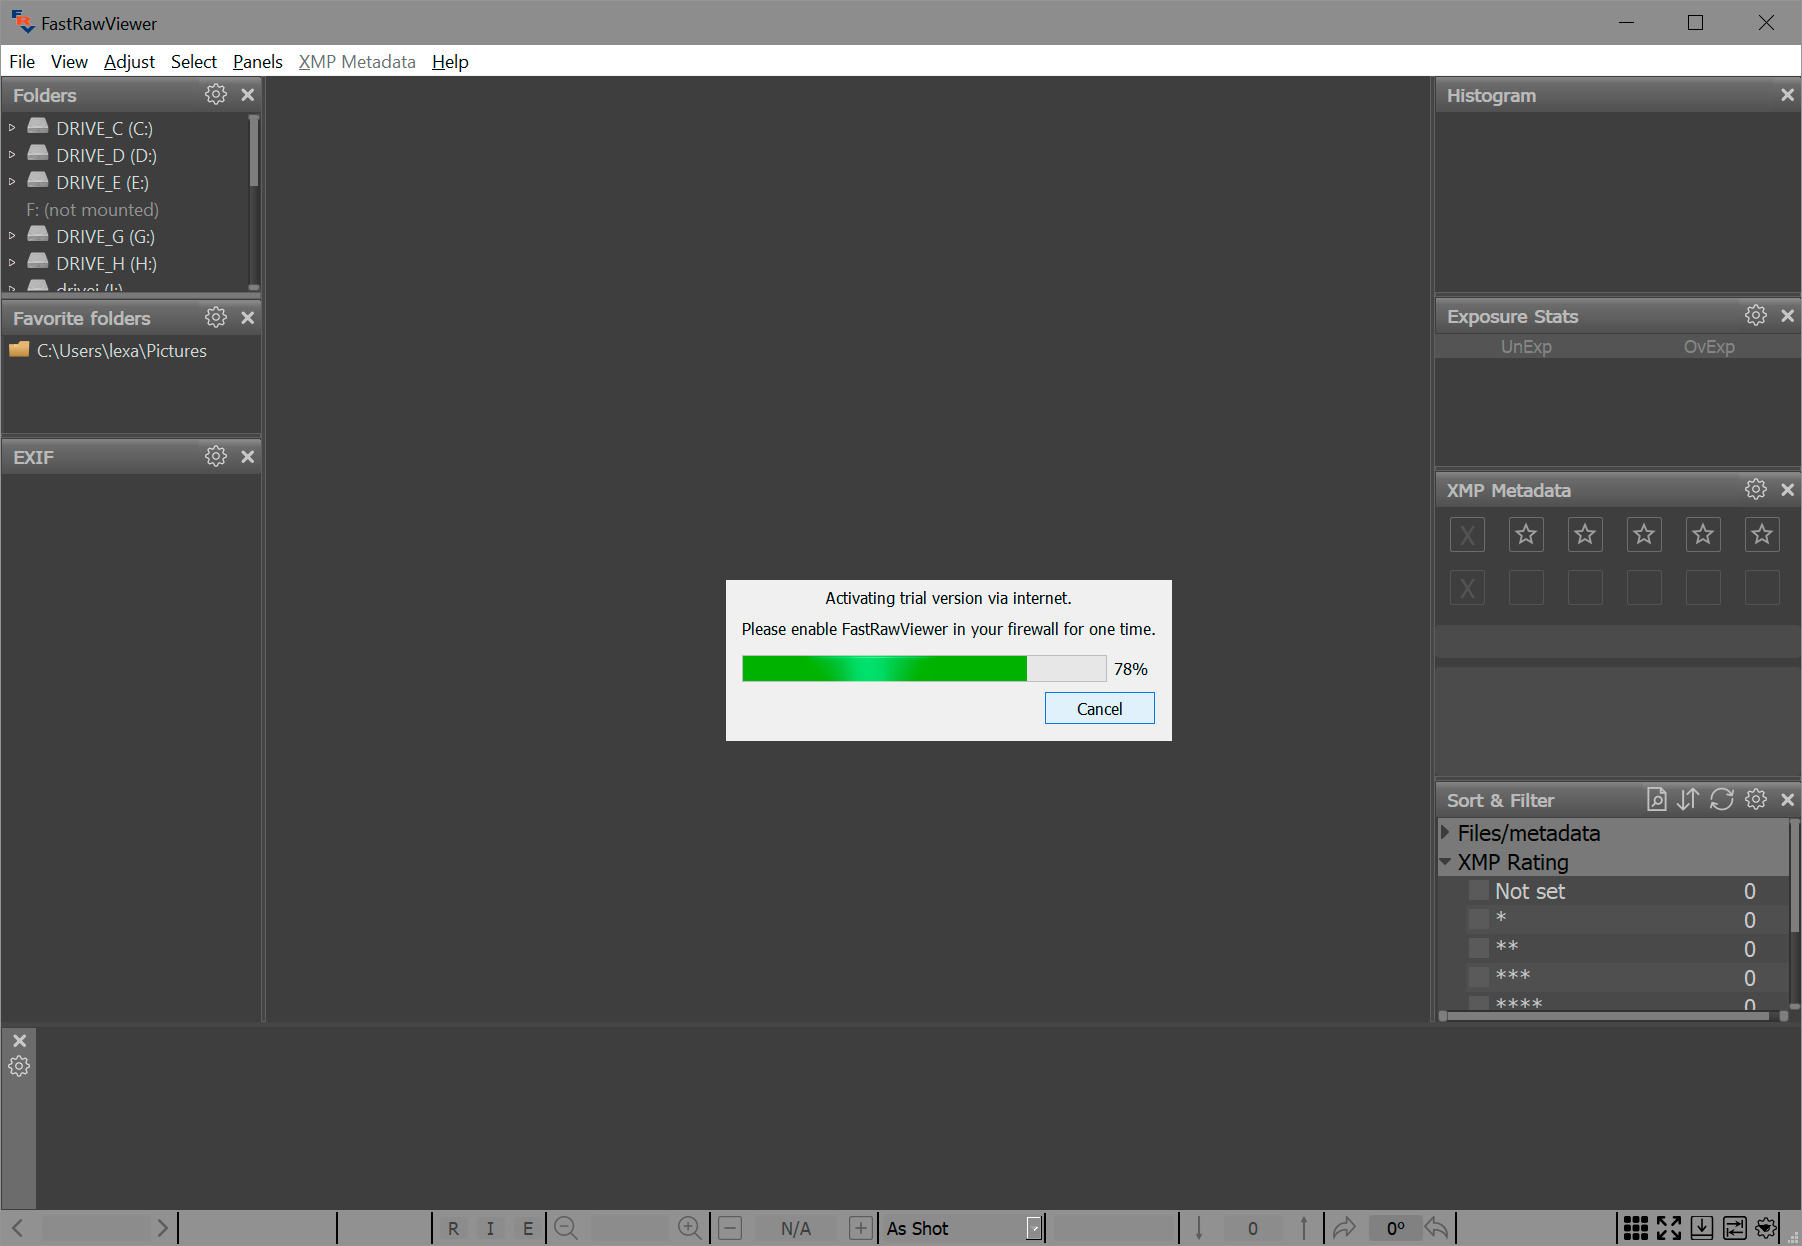
If you are connected to the Internet and FastRawViewer is not blocked by a firewall, the activation of the trial version happens automatically and nearly instantly, after which the 30-day trial period starts
No private data is transferred during the activation process; the only data that is passed through the Internet is FastRawViewer version number and unique non-reversible 64-bit hash code identifying your computer; this code can’t be decoded to extract any private or personal data.
After the successful automatic activation the trial period begins; the trial time left is indicated in Help-About window and on the splash screen that pops up when FastRawViewer is started.
In case the automatic activation was impossible for some reason (no Internet access, or FastRawViewer was blocked by firewall) you will be presented with the screen for manual activation:
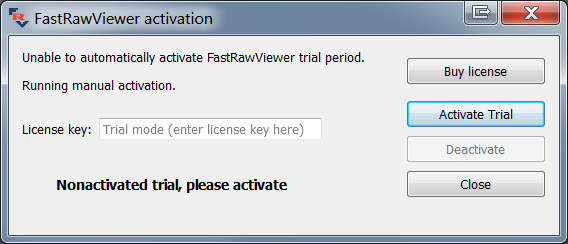
Here you can allow FastRawViewer a one-time Internet access and press Activate Trial button to start 30-day free trial period.
If after pressing Activate Trial button FastRawViewer still can’t access activation server an additional button for Manual Activation will appear:
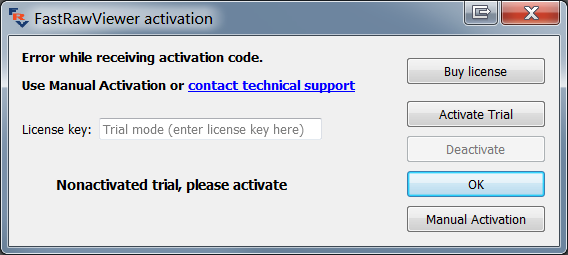
Pressing this Manual Activation button will take you to manual activation dialogue (for more details, please see below, in “Manual Activation” section).
Activation of the License You’ve Purchased
To use FastRawViewer after the trial period, the user will need to obtain a full license.
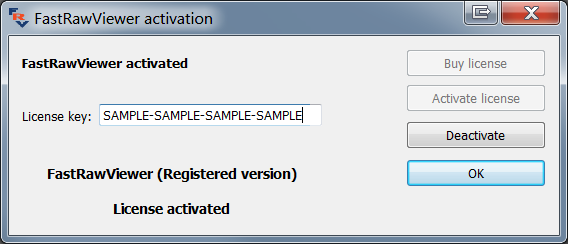
To obtain the license, please click the Buy License button or open www.fastrawviewer.com/purchase in your browser. As a result of the transaction, you will be provided with the license key (online and as a separate email). This license key should be entered into the License Key field of the activation dialog, which is also available through Menu-Help-Purchase/Activate:
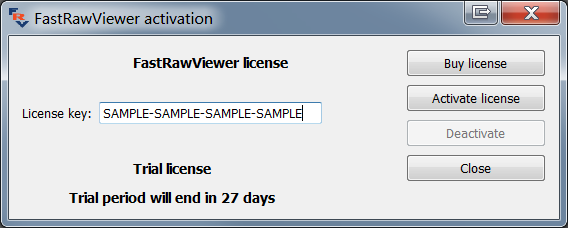
After the license key is entered, please click Activate license button. The license will be activated and you will be able to continue using the program.
The Help-Purchase/Activate menu item will now be renamed to Help-Registration data, and the respective dialog will show your registration data:
To complete the activation (of both the trial and the fully licensed version) the program needs a one-time access to the Internet. If you cannot grant the appropriate Internet access permissions, you can activate the program manually.
Manual Activation
If the program fails to connect with the activation server (one-minute timeout happens), you will see a pop up alert, with a Manual Activation button on the bottom right of the notification window.
After clicking the Manual Activation button, a Manual Trial Activation window will pop up:
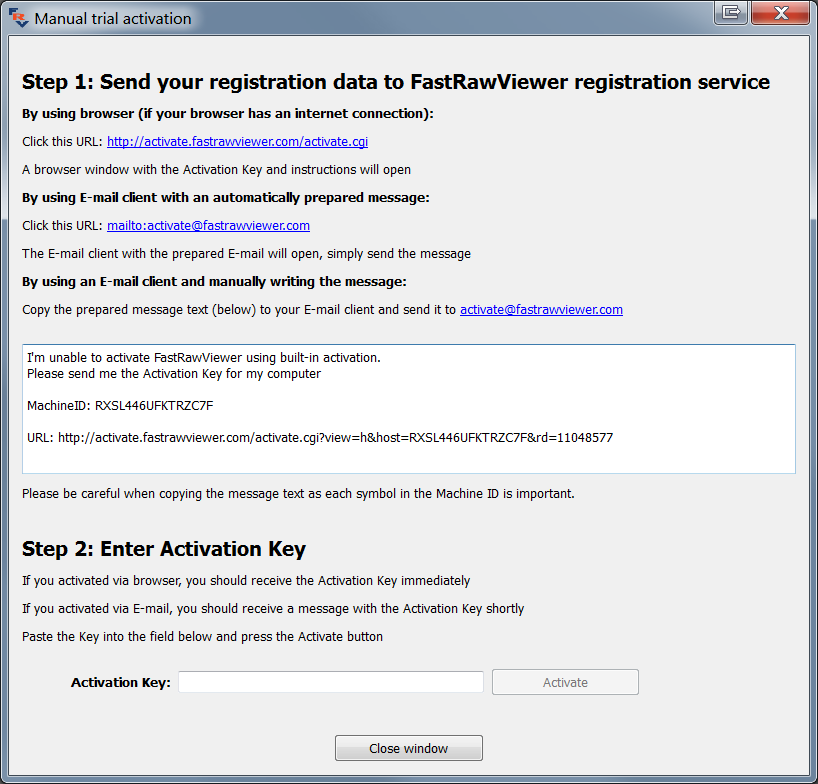
Depending on your Internet access, you can use one of the 3 ways to obtain the activation code:
By using browser (if your browser has an internet connection) – use this if your browser can connect to the Internet.
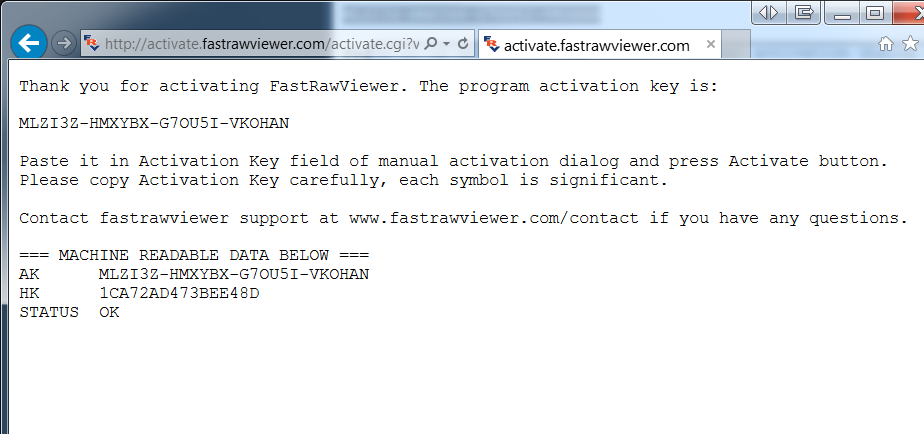
Simply click this link: http://activate.fastrawviewer.com/activate.cgi and you will see a browser window pop up with your unique activation key:
By using E-mail client with an automatically prepared message – click the mailto:activate@fastrawviewer.com link and your mail client will create a new pre-populated email to activate@fastrawviewer.com You will only need to click send.
By using an E-mail client and manually writing the message – you can send an email to activate@fastrawviewer.com using the text in the window below (“I'm unable to activate…”).
If you choose to obtain the activation key via email, you will receive a reply email with the text identical to that which you would see in the web browser (the activation key, however, will be different).
You can then use the Activation Key (from the browser or email) and enter it into the Activation Key field (it is best to use Copy-Paste, as every character of the key is important) and press Activate.
After clicking the Close window button, the window will close and the FastRawViewer activation window will display the registration status.
Frv-activate: Command-line Activation tool
If you are going to install FastRawViewer on several computers, you can use an utility to activate FastRawViewer from the command line:
- Windows: C:\Program Files\LibRaw\FastRawViewer\frv-activate.exe
- Mac: /Applications/FastRawViewer.app/Contents/Resources/frv-activate
When launching this utility without any parameters, you will get a list of all of the parameters with detailed explanations for each of them. The basic scenario is:
frv-activate -l license-key
This utility has more capabilities (trial activation, deactivation) and can also be used with http proxies, including password-protected ones.
First launch: automatic search for RAW-capable applications
During the first launch, FastRawViewer performs a search for the applications, capable of processing RAW images that are known to FastRawViewer. If any of those are found, the following dialogue appears:
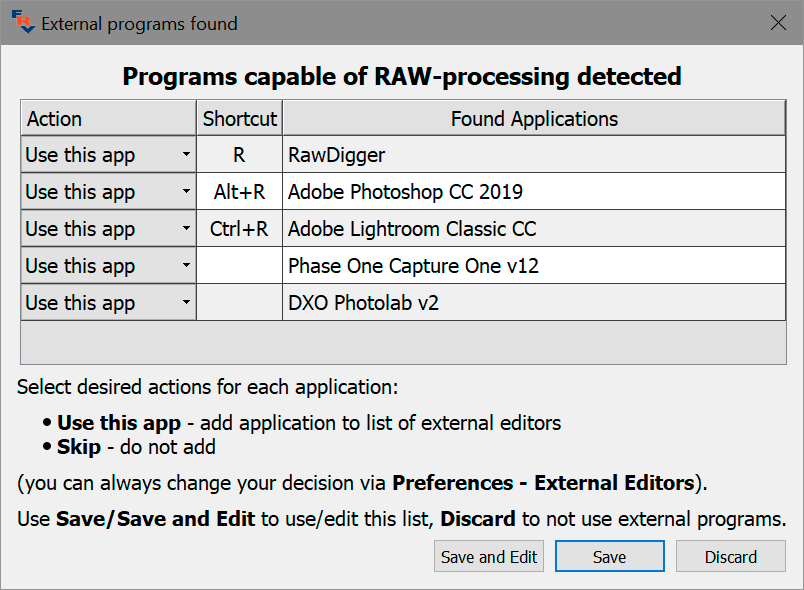
For each listed application, you can choose to use it (Use this app) or not (Skip).
Additional applications (those that are not currently known to FastRawViewer, or some older versions of the known applications) can be enabled through Preferences – External Editors. Changing hotkeys (Shortcuts) is described below in Setting the Keyboard Shortcuts.
1st Run: Windows Hardware Acceleration Method Selection
FastRawViewer uses graphics acceleration for many operations. When working in Windows, the following graphics engines can be used:
- OpenGL (hardware acceleration).
- DirectX 9.
- DirectX 11 (Windows 7 and newer only).
During FastRawViewer’s first launch, an automatic selection of the graphics engine is made, depending on the operating system and the hardware you have:
- Windows XP/Windows Vista: DirectX 9 will be selected.
- Computers with old Intel graphics adapters on a separate chip (chipsets like G45, 845G, 965G, etc.): DirectX 9 will be selected.
- Computers with two or more graphics adapters, or two or more monitors: OpenGL will be selected.
- All other cases: DirectX 9 will be selected.
The above-listed rules are sorted through “from top to bottom” and the first fitting one is used.
The choice of graphics engine is made once and stored in the Windows Registry, so that the process of the selection of the graphics engine is not repeated during subsequent launches of FastRawViewer.
The automatic selection of graphics hardware acceleration can be, however, changed by the user, either through the FastRawViewer Preferences (see the “GPU Processing” section in the “Program settings” chapter), or by launching the Registry scripts (see the “Setting the graphics acceleration manually” section in the “Troubleshooting” chapter).
In rare cases of problems, usually caused by a buggy old video driver, the automatically chosen graphics engine might not work with your hardware/drivers. In this case one of the following will take place:
- If in DirectX11 mode: the program will switch to DirectX9 mode (so that DirectX9 mode will be active when the user re-launches FastRawViewer) and exits.
- If in DirectX9 mode: the program will switch to OpenGL mode (so that OpenGL mode will be active when the user re-launches FastRawViewer) and exits.
- If in OpenGL mode: the program will suggest switching to DirectX9 mode and re-launching the program.
This is described in more detail in the “Troubleshooting” section.