Using the Program: First Steps
Launching FastRawViewer
To launch the program:
- Start it up the usual way (Double-click the icon).
- Or drag any RAW or JPEG file onto the icon, then the program will open and display that file.
- Or drag a folder (catalogue) onto the icon - the program will start and will open the first RAW file in the folder.
After start-up you will be presented with the program’s main screen.
Main Screen
View modes: “Grid” and single-file
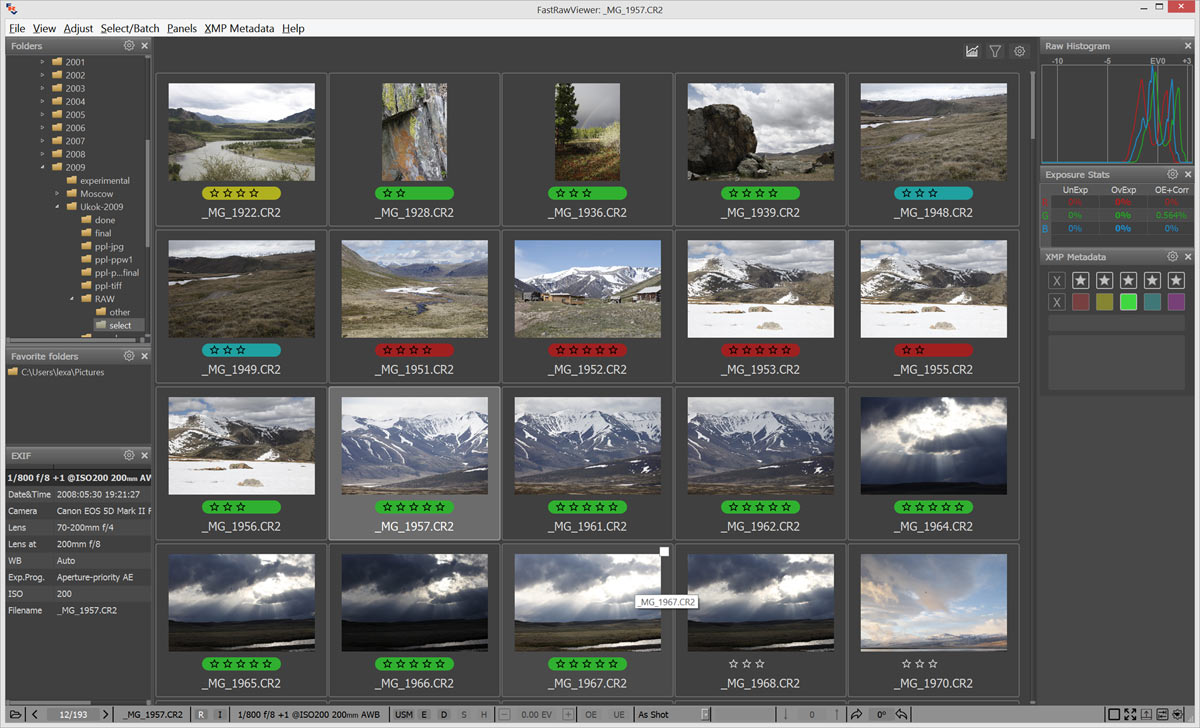
If FastRawViewer is launched without indicating a filename, if will start in Grid mode, displaying the content of a selected folder:
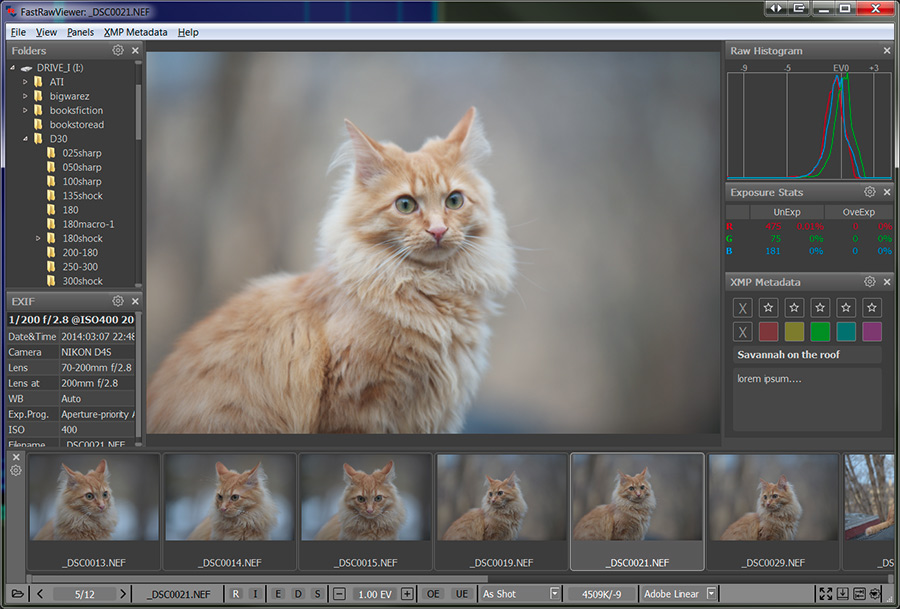
If FastRawViewer is launched over a specific file (for example, by dropping a RAW file onto the program’s icon, or by double-clicking a file which is associated with FastRawViewer), or by selecting one of the files from the “Grid” by:
- A double-click on the file.
- Menu – View – Switch to single image (G key by default).
- Navigation by using the “arrowkeys” in the main window or the bottom “Filmstrip” bar and pressing Enter.
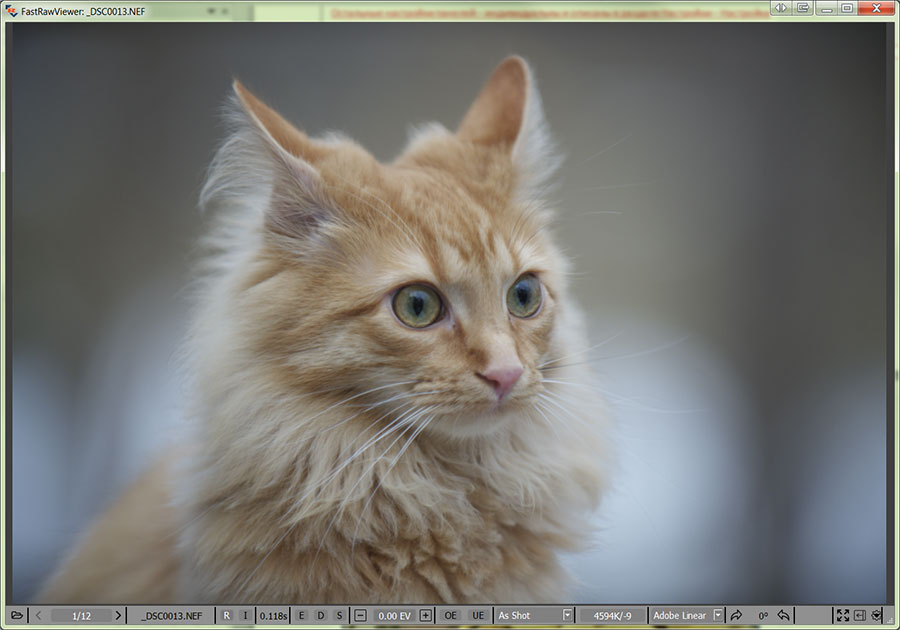
The program will switch to a Single-File View mode (Single File view):
Switching back to Grid mode:
- Menu – View – Switch to image Grid (or press G).
- Menu – View – Close single image (or Esc; Esc/close single image also exits full screen mode).
On the program main screen:
- On top, as usual, there is the menu that allows access to almost all features, excluding those actions, which can only be performed with the mouse.
- File – navigating through the files (opening files and folders, moving to the next file, moving files to different folders, sending the currently displayed file to an external program / raw converter).
- View – controls image display mode (full-color or per-channel viewing; outline the highly detailed areas and areas containing high-contrast edges (focus peaking), etc.).
- Adjust – actions that alter the XMP Sidecar files: changing exposure, white balance, and orientation.
- Select/Batch – actions with several files.
- Panels – controls the visibility and layout of information panes; on the above screenshot, those panes are located to the right of the image.
- XMP Metadata – allows to choose XMP Ratings / XMP Labels.
- Help – the name says it.
- Located in the central part of the window:
- If in single file mode, the RAW image is displayed;
- If in “Grid” mode, the preview thumbnails of the current folder are displayed.
- To the left, the following panels are displayed:
- Folders tree and the Favorite folders panel (those folders which were selected for quick access).
- EXIF data.
- The following panes are located to the right:
- Histogram (RAW for RAW files, JPEG – for JPEG display).
- Over/Underexposure statistics.
- XMP Rating and XMP Label.
- Sort & Filter: Panel for sorting and filtering the files in a current folder
- The Filmstrip/Thumbnails panel is placed below the window, showing the file previews for the current folder.
- Additional information and operational elements are placed in the bottom (status) bar.
Default elements:- File open icon.
- Buttons for navigating through the current folder: previous file, number of file in the file list and the length of the list, next file.
- Buttons for switching between RAW-JPEG-external JPEG.
- Buttons for turning on Screen Sharpening, Focus Peaking, Shadow Boost and Highlight Inspection.
- Exposure Correction control button.
- Overexposed and Underexposed area display buttons.
- Preset White Balance choices drop-down menu.
- Contrast Control section: the up/down arrows and the current setting indication.
- Buttons for quick control: Fullscreen, hide/show Filmstrip panel/all panels, display and edit settings call-up.
- Aside from the aforementioned, if the window is wide enough, the following buttons will be displayed:
- File name
- Brief EXIF data for the shot (Exposure settings, ISO setting, applied exposure compensation, use of flash, lens's focal length).
- Manual White Balance customization button.
- Contrast Curve selection menu.
- Image Orientation indicator and Rotation buttons.
Additionally, the following settings can be indicated if desired:
- The name of the current folder.
- Current image zoom factor and the control buttons.
- Time spent on the loading and decoding of the current file.
- Per-channel display (R-G-B) button and simulated conversion to a black and white version.
- XMP rating and label control buttons.
The elements shown in the bottom status bar can be customized according to your needs. For this, press the “Customize FastRawViewer” button on the lower right corner of the screen, choose “Customize bottom bar” and select the necessary display mode for each possible element. For more detail, see below in the “Customizing the status bar” section.
Workspace
The informational panels (Histogram, EXIF, Folders etc.) can be dragged from the main window of the program to the side (for instance, to a second monitor) and be made “floating”. Panels can be turned on/off through the Panel menu (or the F2-F7 hotkeys), the statistics and XMP-data panels are fixed in size, but the sizes of the other panels can be changed.
The header of every panel has a settings button (gear icon, ); when pressed, it brings forth a menu, allowing one to customize the panel.
Any floating panel can be made semi-transparent and placed in the workspace, above the image.
Setting Preferences – Interface – Panels - Disable transparency for panels outside of main window makes a floating panel completely non-transparent when it is placed outside the main program window.
The other panel settings are individualized, and are described in the “Informational Panel settings” section.
Informational panels can be closed (‘x’ on the upper right corner of the panel or corresponding item in Menu – Panels), and re-opened through Menu – Panels. The same menu has the option Move all panels to dock, which will restore the standard layout of the program workspace.
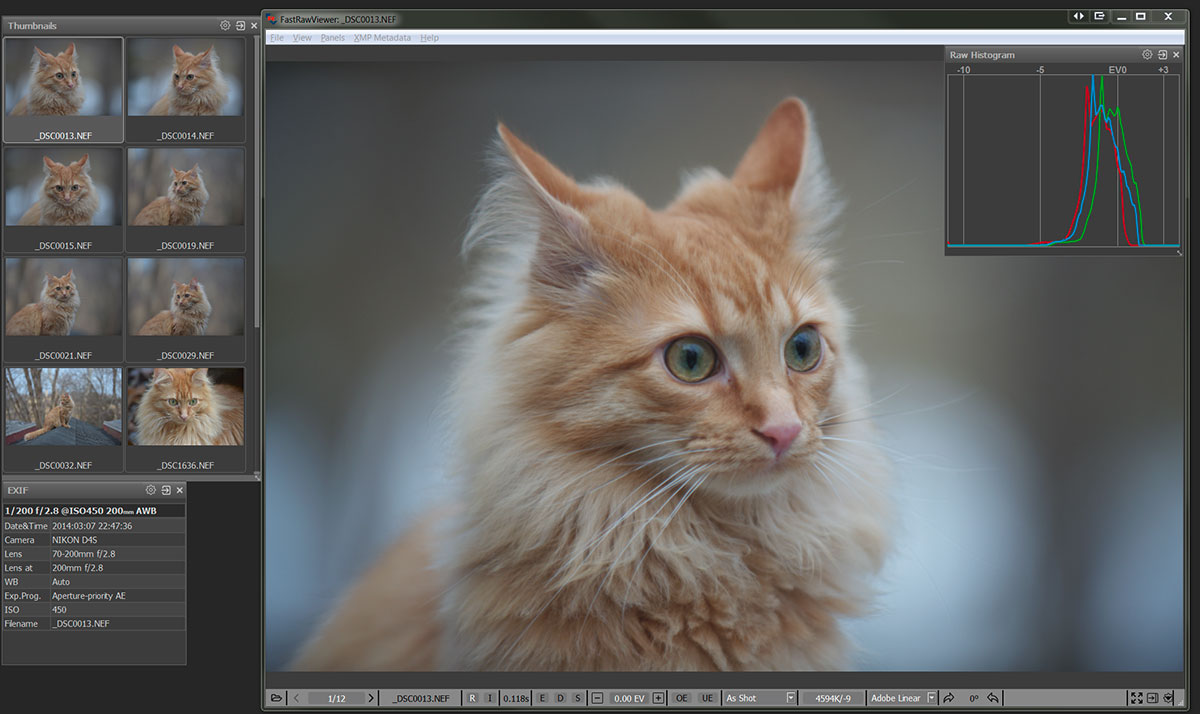
Menu–Panels–Hide all panels (or, press Tab) – hides all informational panels:
With this, the top menu bar is hidden as well (this can turned off through Preferences – Interface – Panels - Hide menu bar when hiding information panels). You may, also, hide bottom information bar (status bar) by setting Preferences – Interface – Panels - Hide bottom window bar when hiding information panels.
Pressing Tab key the second time returns everything to the way it was.
You can disable the hiding of informational panels that are outside the program window. This is useful when, for instance, you have moved them to a second monitor: Preferences – Interface –Panels - Do not hide panels outside of main window.
Menu – View – Fullscreen (or the F key, or Fullscreen button on the bottom bar) switches the full screen mode on/off. Choosing this item again or second press of the F key escapes from full screen mode (for Mac OS X 10.6 we have no true full screen mode, instead the main program window will be maximized).
Changing the Settings
To bring up the settings control window, use Menu–File–Preferences (Ctrl-P) on Windows,
Cmd-comma (,) on Mac/. You will be presented with the following:
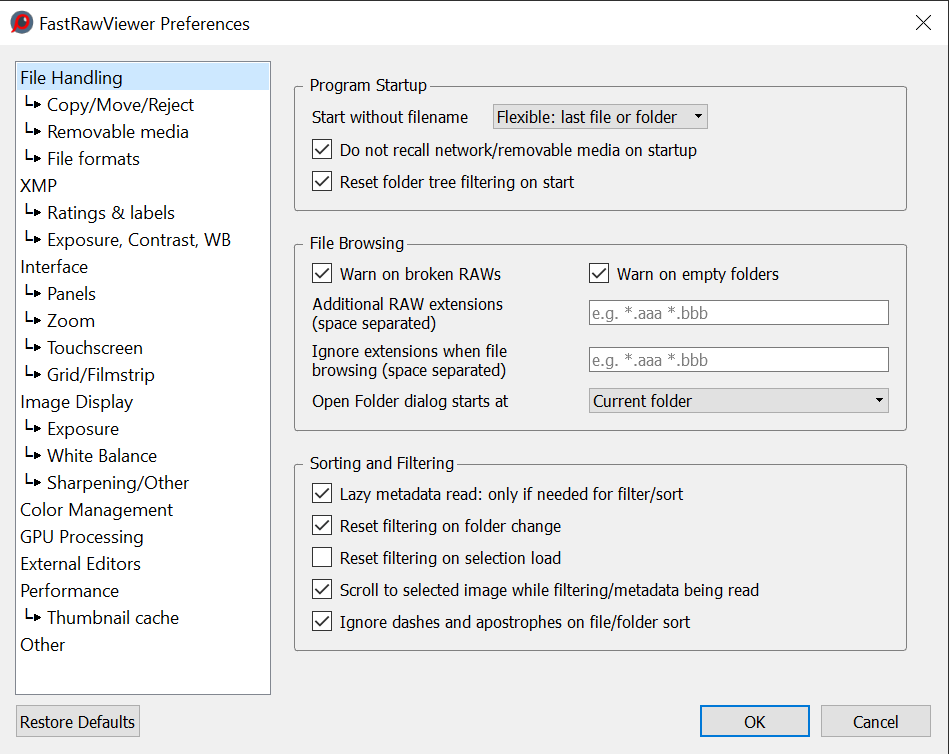
Further in the text, this settings control menu (Preferences) is mentioned many times, each time we refer to particular aspects and features of FastRawViewer. Furthermore, everything is described again in the “Program Settings” section.
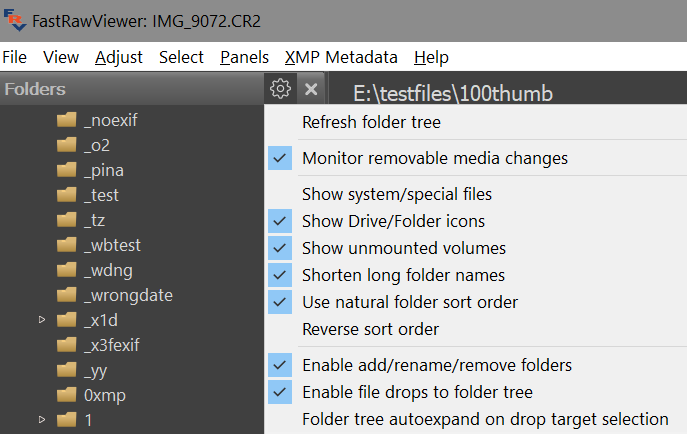
Apart from general application settings (Preferences), each informational panel and the Grid panel has also its own settings menu, under the «gear» icon . These panel settings allow changing different intrinsic parameters of this particular panel. The figure below shows an example of such settings, for the Folders panel.
Help with the Keyboard Shortcuts
Every keyboard action can be seen in the Keyboard Shortcuts Help window, which can be reached by pressing F1 function key or through Menu–Help:
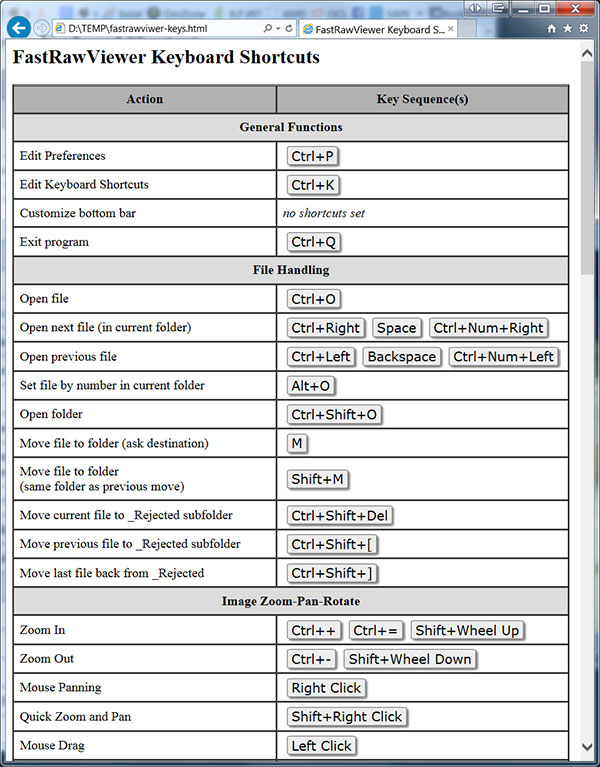
All keyboard shortcuts can be changed and tuned to your taste. The instructions on how to do this are in the “Adjusting the Keyboard Shortcuts” section below. If the keyboard shortcuts are changed, the help window will show their current state.
The standard list of keyboard macros is given in the «Standard FastRawViewer Keyboard Shortcuts» (at the end of the document).
Navigating the Files in a Folder while in Grid mode
In Grid mode, the main section of the window contains the Thumbnail previews of all of the supported files from the current folder.
The following icons are placed at the title bar of this panel (left to right):
- Current folder
- Total number of files in the folder, number of files that passed through the filter, and number of selected files.
- Settings that control the file preview display (see below).
Navigation in Grid mode can be accomplished using the following:
- Keyboard: arrowkeys, PgUp/PgDn, Home/End; also you can use the keyboard shortcuts that you customized for Next File/Prev. File and First/Last File in folder.
- Mouse: the wheel scrolls through the contents of the folder up and down.
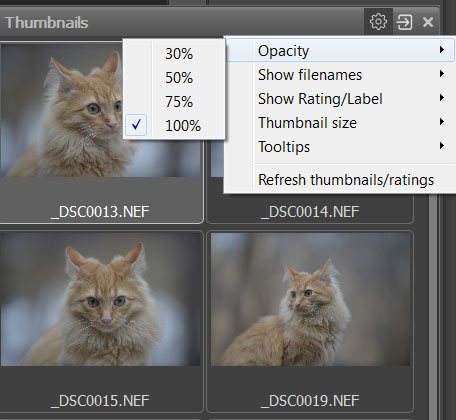
You can customize the file preview using the “gear” icon in the upper-right corner of the “Grid” mode window:
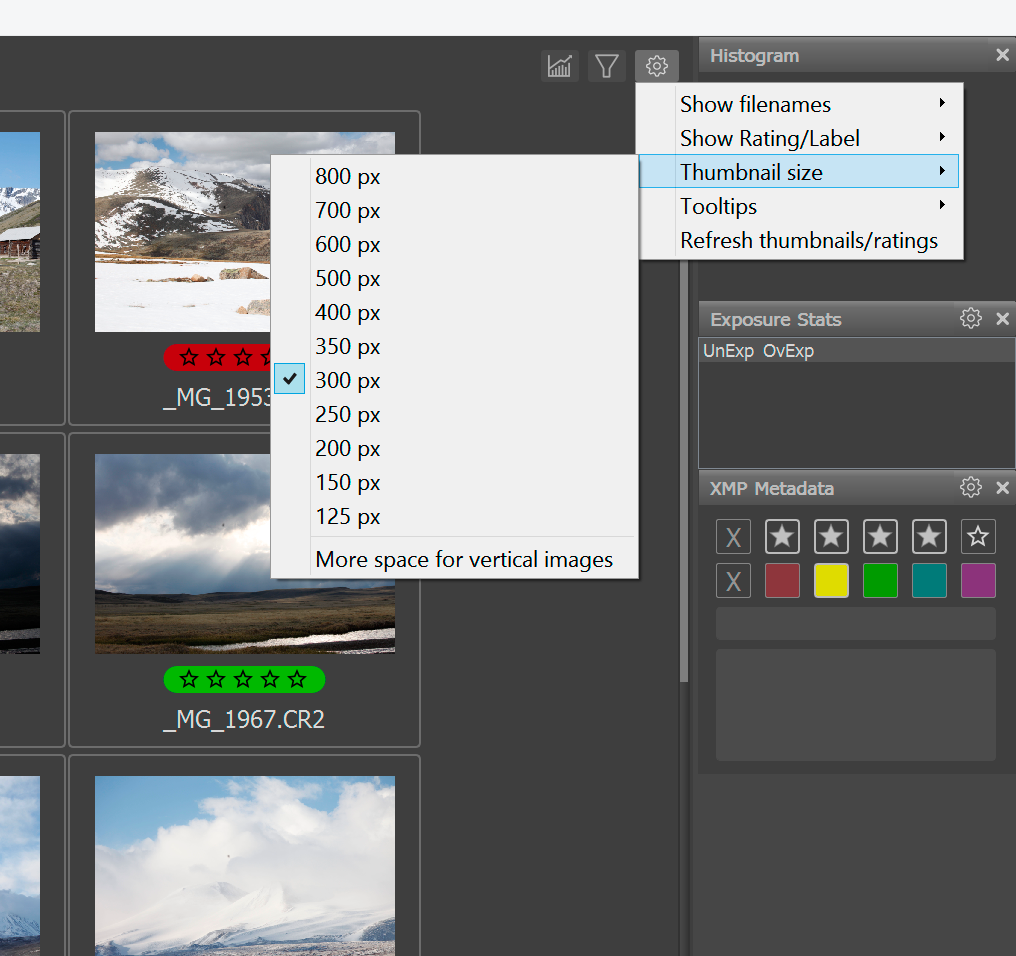
The following data can be found below, above, and overlaid over the image preview:
- EXIF data: date of the shot, or exposure parameters, or the camera name.
- XMP label (color) and XMP rating
- Filename
The displayed data and the positions of the said data are controlled through the “gear icon”, separately for the Grid and Filmstrip modes.
A detailed description of the settings can be found in the “Customizing Display Modes” section below.
When working with very dark (nighttime) shots, the setting Preferences - Interface - Grid/Filmstrip - Apply automatic brightening to thumbnails can be useful, as it turns on the automatic brightening of previews.