White Balance
FastRawViewer offers several methods of setting white balance
- Choose one of the standard presets (As Shot/Auto/Daylight/Tungsten).
- Set it by clicking on the known neutral gray area of the image.
- Set it by choosing the color temperature/tint value.
Indication of the White Balance
The white balance is displayed:
- As the name of one of the presets (or Custom) in the drop-down list of white balance presets (see the next picture).
- As the values shown on the button for manual editing of white balance (to the right of the drop-down list of available white balance presets).
The available white balance indication modes are chosen through Preferences – Image Display - White Balance – White balance display mode
- Color Temperature/Tint – a mode commonly used in RAW converters.
- Mired/Tint – instead of correlated color temperatures, the value indicated is in Mired.
- WB Coefficients – the per-channel coefficients (factors) of white balance are shown.
- Channel EV Correction – the per-channel correction factors in EV (stops) of white balance are shown.
The calculation of color temperature/tint is not possible for all the cameras. It is also not possible for extreme white balance coefficients. Here are the limitations:
- FastRawViewer must have the color data for the camera (for the vast majority of modern cameras, it does).
- The camera has to be RGB and tricolor. CMYG, RGBE, and other non-RGB cameras are not supported.
- A range of color temperatures from 1667 to 25000K is supported. If you set the manual balance (see below) from a deep blue or a dark red area, then calculating the temperature may be impossible.
For those cases where the calculation of color temperature is impossible, the indication of CCT/Tint or Mired/Tint values is changed to “---/--“.
White Balance Presets
For the majority of modern cameras, FastRawViewer contains a large amount of standard presets (settings) of white balance.
Choosing a preset can be done via the drop-down list menu in the lower bar of the program window:
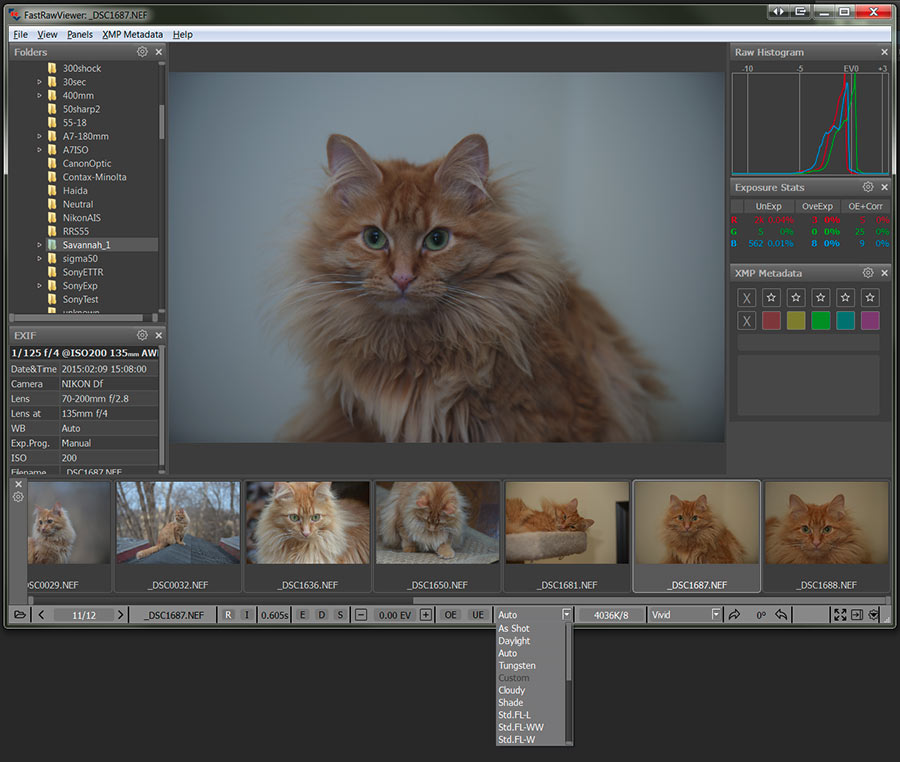
Virtually everything is in this menu:
- As Shot (excluding a small amount of old cameras, which don’t record white balance in RAW).
- Daylight.
- Auto.
- UniWB (sets all coefficients of white balance to 1.0).
The other modes in this drop-down correspond to those individual camera presets, and those vary depending on camera manufacturer and camera model.
Standard white balance modes (As Shot, Daylight, Auto, Custom) can be cycled through using Menu–Adjust–Toggle White Balance (or by pressing W key on the keyboard).
If the RAW file contains a list of standard white balances in its EXIF data, this list will be shown in the drop-down menu (between Auto and UniWB). If there is no list of white balances in the file, then the generic table for the camera model that took the shot will be used instead.
If two neighboring files are taken with one camera, and a mode to preserve white balance when moving between files is active (Preferences – Image Display - White Balance – White balance for next file (same camera), see detailed description below), but the two above-listed files contain different balance preset lists (for example, one file is in the camera’s original RAW format, while the other is converted to DNG), then:
- If possible, the setting (preset) with the same name is preserved.
- If no such preset exists, then the “White balance for the next file (another camera)” is used, meaning that the program assumes that if the lists of white balances are very different between two files, then the camera must have been changed.
Controlling which White Balance will be Used when Opening a File
When opening the next file the White Balance is set in accordance to the settings in Preferences – Image Display - White Balance:
- White Balance for next file (same camera) – sets the white balance mode when opening a file coming from the same camera model as the current file is. Choices here are: Same as previous, As Shot, Daylight, Auto, and Tungsten.
- White Balance for next file (another camera) – sets the white balance mode when opening a file coming from a different camera model. The choice of “Same as previous” normally does not fit here – all other choices are the same as for the previous.
- Keep Custom WB for next file (same camera) – instructs FastRawViewer if the current white balance coefficients should be applied to the next file coming from the same camera model.
Setting White Balance by “Click-Gray” Method
To set the white balance using an arbitrary area of the image as a reference, use Alt-left mouse click.
The size of the area which is evaluated to calculate the white balance can be set through Preferences – White Balance – WB Sampler size
Coefficients will be calculated for the chosen area so as to make whatever is “clicked” gray. The image will change its look (automatically calculated exposure adjustment may change as well).
If the correct color temperature can be calculated with the given coefficients, then it will be displayed on the button for the manual white balance adjustment.
Manually Setting the Color Temperature
When pressing the button with the values of color temperature/shades (to the right of the drop-down list with white balance presets) the manual white balance adjustment dialogue appears:
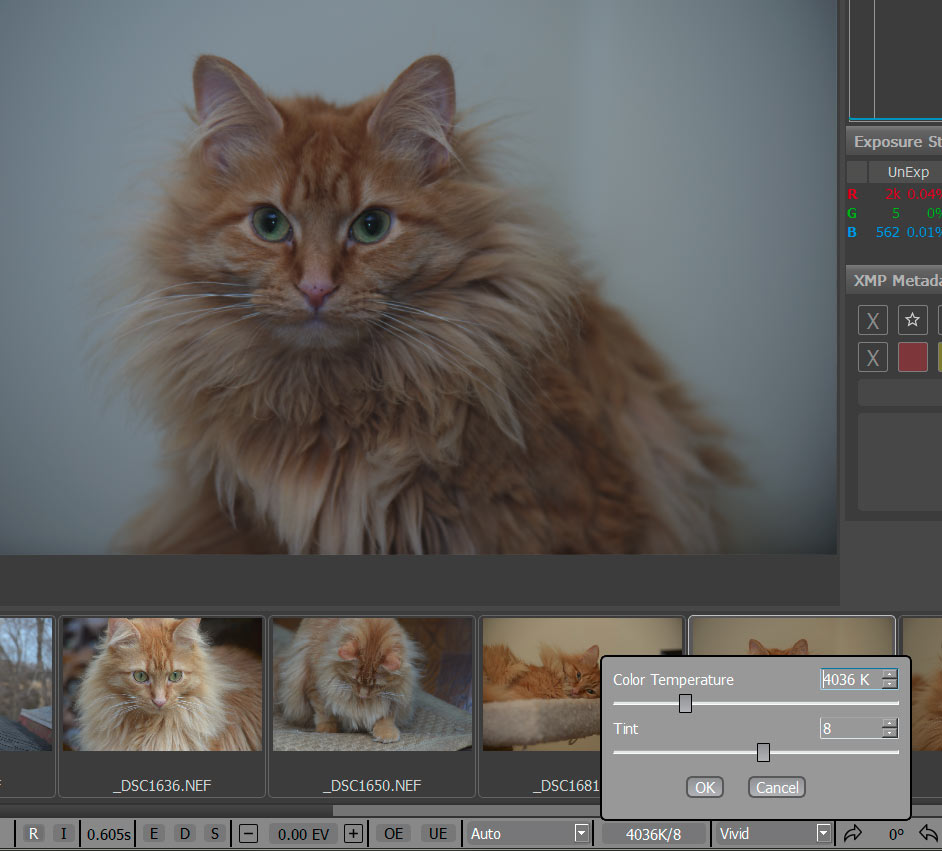
The changes made in this dialogue are applied to the image on the screen on the screen with a slight delay (up to 200ms). If the changes you’ve made satisfy you, hit OK. If not, continue adjusting, or hit Cancel to disregard any changes.
Undo editing
Menu – Adjust – Reset image rendering to defaults (Ctrl-Shift-R, Ctrl-Command-R) applies default image editing settings that are enabled in Preferences – Image Display – Reset rendering to default parameters. Initial defaults are:
- White balance is set to «As Shot»
- Exposure correction is set to «No correction»
- Contrast is set to «0».
These changes are recorded to XMP if XMP support is turned on (default).